BMW M5 Forum and M6 Forums banner

Replacing Valve Cover Gaskets

1 reading
189K views 203 replies 77 participants last post by  Trizzuth  
#1 ·
I'm going to tackle this project in a week or two. I plan on replacing spark plugs and a spark plug/coil boots while in there. I also bought 4 new camshaft position sensors. Is this the time to do these as well as Crankshaft position sensors? What about replacing the thermastat? Would now be a good time to do preventative maintenance of this item? Also, does anyone have a DIY on how to replace the valve cover gaskets? I know there was one on here but I can't seem to locate :confused:
 
#2 ·
..

If you send me a PM to remind me I can get you the instructions from home.
 
#3 ·
don't know about a documented DIY on the valve covers, but if you follow the DIY on the spark plug replacement, you're almost there. I did mine about a year ago, and it wasn't very difficult. I followed the TIS instructions, and they were fine. The only thing I remember the TIS instructions didn't have was the torque spec for the cover bolts. Other than the BMW gasket you'll also need some high temp gasket sealant which I picked up at NAPA.

I've also replaced a CPS sensor and would imagine it would be a bit easier to change without the valve covers there. I would cover the whole valvetrain with clean rags if you go that route. You definitely don't want to drop anything in there.
 
#4 ·
I'm tackling this my self right now. Any DYI instructions? I can't seen to find via search. seems like plenum needs to come off, not just spark plug cover
 
#6 ·
Come on people!!!

I really have tried searching, but I cannot find anything with DYI instructions or step by step procedures. Only reference to the 540, which doesn't have the plenum cover.

I know it costs ~$600 to replace, but I'm trying to tackle this my self, because my Clutch job went way over budget (~$3k), despite it's ALL STOCK!!

Help pls... hopefully TIS has good info.
 
#8 ·
Bump!! I guess there isn't one?? I was hoping some expert members would chime in and hammer us on "not using the search function"... I'll take that, so long as I get pointed to the right direction.

I plan to have pictures for write up, but need to get a hold of SOME instructions before I complete... have the plenum cover opened up as we speak...
 
#10 · (Edited)
I lost my TIS, and hoping Gamedemon can give me his copy once I have a chance to go pick up. Yes, if you could be so kind to send me the TIS, I hope to spend some time to write this one up, given there isn't one on the board it seems. TIS can't be all that great, but gotta be better than nothing.

I have changed my 525i's valve cover w/o TIS, straight forward. But the beast I'm stuck.

- remove charcoal filter boxes
- remove plenum cover
- disconnect MAF & fumes return pipes
- uh.... so many damn screws, what do I remove next??

Dave - Ted said you need a valve cover job too (not the diablo) - I have extra set, once I figure it out, you can hopefully get yours done too.... a la DYI

yangchi927@ameritech.net
 
#14 · (Edited)
I've changed mine a while back. No pictures but you really don't need any.

1. Remove microfilter air box.
2. Remove the airbox ducting by gently rotating it up about 30 degrees and it will be free of the firewall.
3. Remove the plenum cover.
4. Remove all the intake horns.
5. Remove the thousand nuts in side the plenum.
6. Remove all vacuum and assorted tubes going to the plenum bottom and remove the plenum bottom.
7. You'll be looking at a brownish colored "gasket-flange". (#9 from http://www.realoem.com/bmw/showparts.do?model=DE93&mospid=47592&btnr=11_2670&hg=11&fg=40 ). Remove this as well.
8. Remove the spark plug cover.
9. Remove ignition coil fasteners and coils. Spark plugs can stay. By the way, nows a good time to change plugs, but don't drop anything through the spark plug holes.
10. Remove the bolts holding the rocker cover to the cylinder head and lift off the cover. It will take some serious wiggling.

Reassembly:
1. The Bentley service manual is useful at this point as the 540i has the same type of rubber gasket as the M5. Page 113-82. It will tell you to apply Three Bond 1209 but I couldn't find this stuff. I used Permatex Ultra Rubber Gasket Sealant & Dressing. A "small amount" is used in the corner of the half moons.
2. This is the "fun" part. Wiggle the rocker cover back into its absurdly tight spot without disturbing the gasket and without scratching the cover all to hell.
3.Reinstall the cover fasteners and tighten in "1/2 turn steps." (Bentley quote)
4. Per Bentley, torque to 7.5 ft-lb.
5. Put everything else back. Unfortunately, I can't recall the torque specs for the plenum reinstall and I don't know were I sourced that info.

Now is also a great time to replace the infamous evaporative emissions purge valve: http://www.realoem.com/bmw/showparts.do?model=DE93&mospid=47592&btnr=13_0838&hg=13&fg=15&hl=38 (#14) Otherwise known as the fuel tank breather valve. ($57 and worth every penny not to have to remove all those damn plenum nuts again.)

Soapbox: Its been stated in other threads that the fuel tank breather valve was easy to change. Who are these people? I found it a real back and knuckle buster. Those clever German engineers clearly never meant it to be changed. I found the M5 clutch replacement to be much easier. Stand down.

25,000 miles and no leaks.
Hope this helps,
Joe
 
#15 ·
This is a HUGE help... along with the TIS (good but incomplete)

I'll also say step 7 was not exactly necessary, but would have been easier removing the cover.

I have everything torn apart now, looking for the "frictionless ruber compound" and the "drei bond" stuff before I put things back together. Should have picked up plugs...

Now to the tightening torques needs a little more help. I hope to summarize this after all I'm done so we have a DIY on the board.

Having removed everything, there were a few things I found tricky and dangerous - intake hose to the plenum was hard to remove, take force, was afraid of breaking it.

cover gasket was HARD to wiggle out. takes force, patience. I used the front pipe (where vacuum hose connects to) to "pry", was worried about breaking something.

Three of the cover bolts on the front do not come off, just unscrew all the way.


plenum covers: first 5nm, inside out, then to 10nm, again, inside out

Battery Terminal: 10 nm

valve cover: 7.5 ft-lb?
ignition tie down: ??
ignition cover: ??
 
#16 · (Edited)
Pictures up. Job completed. Valve Cover Gasket DIY.

I wanted to take pictures from beginning to end, but ended up taking pictures from everything apart to back together.

Same idea. whole thing took me ~ 7 to 8 hrs, but if I need to do it all over again, under 5 hours for sure, using all hand tools.

You can see pictures in this link, with some descriptions

http://www.flickr.com/photos/chinoyang/sets/72157603770856790/

Or pictures below w/o descriptions:
Image


Image


Image


Image


Image
 
#18 · (Edited)
Okay, you asked for it, here's the Valve Cover Gasket DIY step by step:


Start – this is how the engine looks like:
<o:p> </o:p>


<o:p> </o:p>
  • Remove cabin air filter boxes
    • Remove cover
    • Remove clip and hood switch connector (driver side only)
    • Unclip boot to cabin filter housing
    • Remove cabin filter housing
    • Turn boot upwards (fragile fingers), then remove
  • Remove air intake boots, or entire air filter housing cover w/ MAF
    • Disconnect MAF connectors
    • Pay attention to cables tied to the intake boot (elbow)
    • Loosen hose clamp, and remove boot
<o:p> </o:p>
Here’s how it should look like now


<o:p> </o:p>
  • Remove 11 bolts on the plenum cover – DON’T DROP THEM. (size 10)
    • installation: torque to 5nm, inside first, then outside. Then to 10nm, inside first, then outside
<o:p> </o:p>
Here’s how it should look like now


<o:p> </o:p>
  • Remove all the horns (size 8, 2 per horn)
    • Cylinder 1 and 5 are unique, all others are identical. Note their orientation, mark them before removing if you want to be safe
  • Loosen two screws that hold the oil separator to the plenum housing
  • remove (carefully) the oil separator from plenum housing
  • loosen hose clamp to the base of the oil separators, remove them (I cleaned mine with carb cleaner, they were filthy)
  • loosen hose clamp to the base of the plenum housing
<o:p> </o:p>
Close up pictures, all 4 hose clamps shown


<o:p> </o:p>
  • Remove screws (LOTS of them) that hold the plenum housing size 10
    • 16 on the driver side, 17 on the passenger side
    • installation: torque to 5nm, inside first, then outside. Then to 10nm, inside first, then outside
  • Wiggle the plenum housing, patiently and slowly, it should detach
  • You should remove the intake gaskets at this point. Use a small flathead screw driver to remove hose clamp from the center of the engine
Picture shows passenger side with intake gaskets removed, right side still on. That’s what you see AFTER removing the plenum housing


<o:p> </o:p>
Everything here on is similar on both sides
  • Remove ignition coil cover – 2x 10mm nuts
  • Remove all the ignition coils, 2 per coil 10mm nuts
  • Remove all ground wires (3x), and the nuts holding the ignition coil wires (2x)
<o:p> </o:p>
Here’s where you are now:


<o:p> </o:p>
  • Remove a whole bunch of valve cover gasket nuts (DON”T DROP THEM like I did) (10mm, tightening torque 7.5 ft-lb)
    • Driver side, remove the battery terminal nut (19mm?). Disconnect <st1:place>Battery</st1:place> in your trunk first.
    • Passenger side, remove the oil cap
  • Now the fun begin, pull, wiggle, grab from the front of the valve cover (where vent hose goes), and pull, wiggle, swear, pull some more, wiggle, and HOPE it comes off soon.
  • When it’s off, you’ll have to carefully pull things off, without scratching too much. Driver side is harder than passenger side – less room
<o:p> </o:p>
Here’s what you should see on the passenger side when you remove
Image
<o:p> </o:p>
Valve Cover on the floor


<o:p> </o:p>
  • Clean the grooves on the cover with metal wire brush
  • Clean the head joint surfaces with carb cleaner, ensure CLEAN
  • Apply silicon at 6 places
    • Where Vano housing joins the Head toward the front (2x)
    • Each of the 2 corners by the half round toward the back (4x)
<o:p> </o:p>
Everything is now in reverse order.
<o:p> </o:p>
See post #14 from M5Joe, that’s what got me thru with this DIY.
<o:p> </o:p>
Cheers
<o:p> </o:p>
(Above Drive/Passenger side is based on US LHD model)<o:p></o:p>
 
#22 ·
I didn't take a good look, since I wasn't intending to start changing EVERYTHING. although maybe I should have. One of the thread above stated a fuel sensor to be replaced - I didn't. I would imaging CPS would be easily accessible at this point.

Perhaps take a closer look at my engine bay when everything has been removed. It's rather high res, so zoom in... :)
 
#26 ·
Wow, 2 hours, why did I not use my torque driver to remove the 400 nuts??

I'm sure there is a spec on the sealant, but I winged it. I applied to both sides though, metal AND gasket, but between gasket AND the head, not gasket and valve cover.

The 6 places per side are:
- 2 at the vanos / head joint towards the front
- 4 at the right angle of the 2 half round that's on the gasket. I apply a small dab at the sharp corner on the head, and a dab on the gasket it self.

Now, putting it back in will be challenging, make sure the half moons are sitting perfectly before putting everything back. That's where most people leak - to think of it, I better check mine this weekend.. :)
 
#27 ·
Wow, 2 hours, why did I not use my torque driver to remove the 400 nuts??

I'm sure there is a spec on the sealant, but I winged it. I applied to both sides though, metal AND gasket, but between gasket AND the head, not gasket and valve cover.

The 6 places per side are:
- 2 at the vanos / head joint towards the front
- 4 at the right angle of the 2 half round that's on the gasket. I apply a small dab at the sharp corner on the head, and a dab on the gasket it self.

Now, putting it back in will be challenging, make sure the half moons are sitting perfectly before putting everything back. That's where most people leak - to think of it, I better check mine this weekend.. :)

doh, thanks for reminding me :eek:
 
#28 ·
Replaced my valve cover gaskets on Sunday. Funny story.

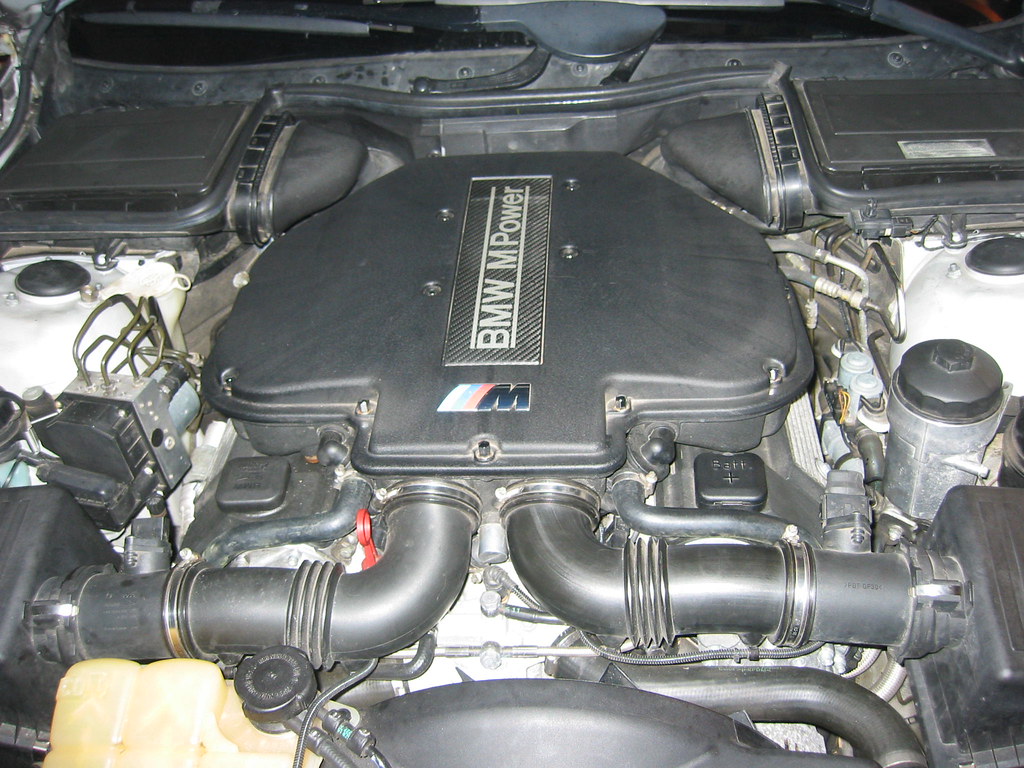
Monday, developed severe leak, dumped a few liters of oil on the highway. I noticed lots of oil squirting out from the oil filter. Replaced oil and filter, replaced o-ring. Seemed to do the trick. Drove off again and noticed large amounts of smoke from the engine and coming into the vent. Quickly hit the recirculating air button and went home. Oil coming out of bank two valve cover gasket (noticed the inner gasket went bad when changing spark plugs a few months back). Tried to repair with gasket sealant. Not a good idea (doesn't do anything, wastes money, and more of a mess you need to clean up).

Purchased gasket from Pelican Parts on Tuesday and arrives Thursday. However, they only sent the inner gasket. The soonest I could get a new one is Monday if they overnight the part (got it too late on Thursday to call them during business hours). Called local BMW--they don't have part. Called one that's bigger and further away, they have one left. I take the bus to work on Friday, use my zipcar rental (Honda Civic Hybrid) and got the part. When I got home to install it, the outer gasket doesn't fit because it's for bank one. Called BMW, they apologized, and were open tomorrow. Go down Saturday, matched the picture I took of the valve cover, and was happy. Installed per the TIS and instructions here, with a few differences, noted below. Started car, brought to operating temperature, and started smoking again. Couldn't check the seal in the back because engine was too hot. I then dared and assumed it was the old oil (took off under armor and cleaned up lots of oil--still cold).

Today is Monday--drove it about 200 miles and drove it hard in some areas. Normally I fill up a liter of oil every week. Check the oil again and the level is the same. I hope this solved my oil burning problem....

So some differences--

Valve cover gasket and the valve cover groove the gasket fits into coated with glycerin, per the TIS. I went to Walgreens to get glycerin (common laxative/stool softener) and could only find suppositories. KY Jelly contains glycerin, so I went to the female product / sex aisle and there was an 80-year old woman (no exaggeration) standing there with a bottle of "warm touch" KY in her left hand and a pair of XL Magnum Condoms in the right hand, reading the back label. Bit my lip hard as to not chuckle (I'm kicking myself for not taking a photo), and went back to the suppository aisle to make sure I'm not missing a bottle. Then I remembered bubble solution contains a mixture of glycerin and water. Bought a bottle of bubbles for $0.59. Don't have drei bond (as called for by TIS), so used high temp gasket sealer only at the place where there's a gap in the valve cover (in the front, where there's a seam in the lip where the gasket sits, on top and bottom). I smeared some and replaced the cover. Total time without air tools (someone stole my air compressor a few months ago) was 3 hours 20 minutes from when I stared (with all the correct parts) to finish. This included cleaning the old oil from underneath the beast.

So the tool list would include the following:

Parts
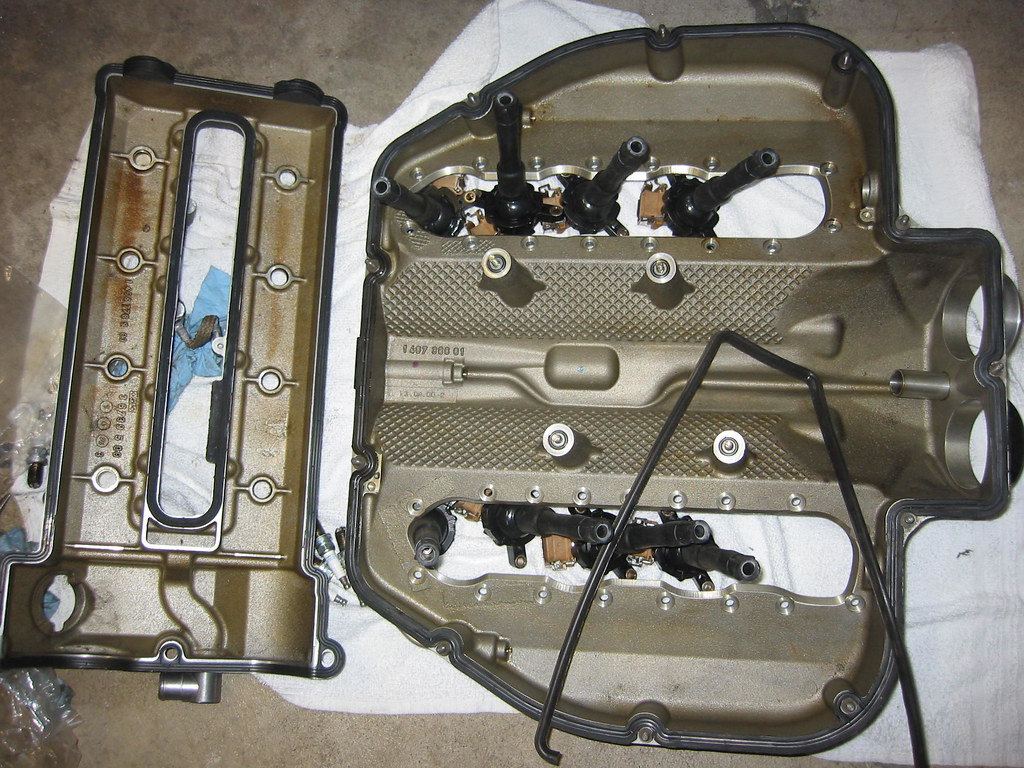
- Gasket, correct side, inner AND outer
- Glycerin (Mr. Bubbles)
- Drei Bond (or Red high-temp gasket goo)

Tools
- 3/8" OR 1/2" spanner
- 1/4" spanner
- 10 mm socket, matching the first spanner
- 8 mm socket, 1/4" (this is for the velocity stacks--better if you have a smaller socket--noticed 3/8" was a little big)
- Wire brush (to remove old gasket material--dremel with wire brush attachment worked well)
- Compressed air (clean out the valve area of bits of crap)
- Flat head screwdriver (to remove hose clamps)
- Pry bar (to remove valve cover--use extreme caution and tape the end to protect the aluminum parts)
- 3 or 4 magnetic trays for bolts
- Magnetic pickups (for when you drop something in the engine bay)
- Phillips screwdriver (to remove the under armor when the magnetic pickups don't get what you dropped)

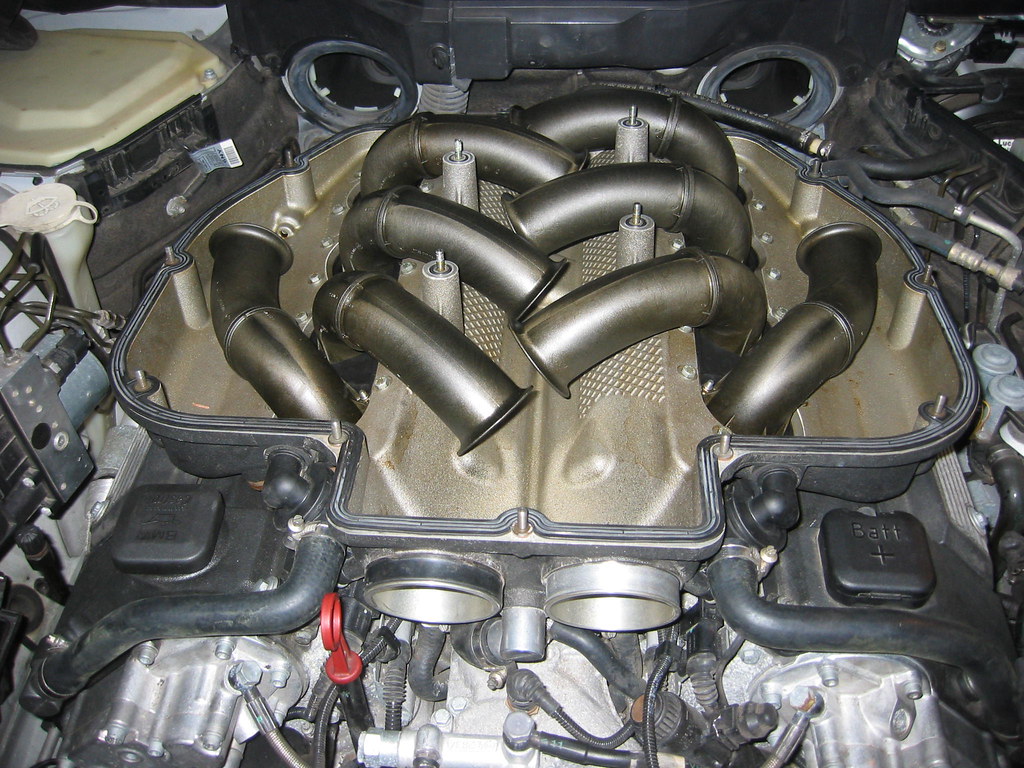
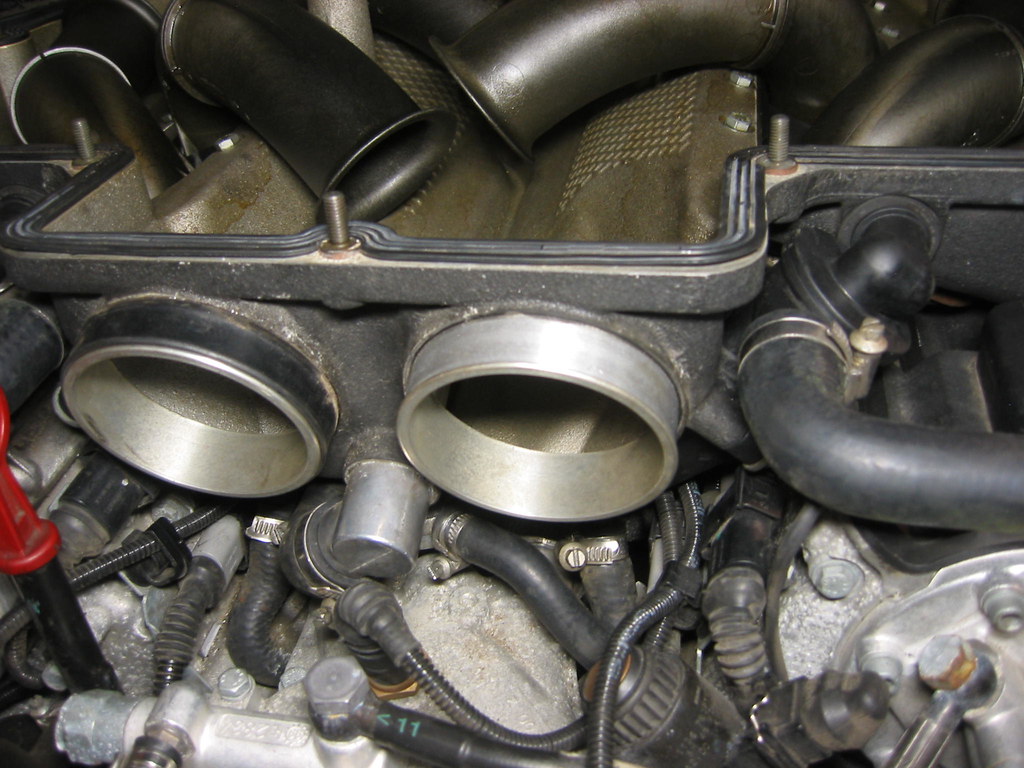
I think that list is comprehensive. Clean the throttle bodies since you have the cover off. I used the spray cleaner and the dremel wire brush attachment. Make sure you don't get metal dust in anything important.

I think that's everything. Should post pictures of the old valve gasket cover. It was missing one of those "half moons", which is a big chunk of the outer gasket.

Don't want to do this anytime soon. Should have replaced bank one since I was there, but removing the valve cover was a serious pain in the *** and scares me in that it feels like you might break something. I'm a firm believer to leave well enough alone if it works well, for risk of: (a) making it worse and/or (b) breaking something else.

My next job is the lower oil pan, since I (and previous owner) stripped the drain bolt hole.