Okay, you asked for it, here's the Valve Cover Gasket DIY step by step:
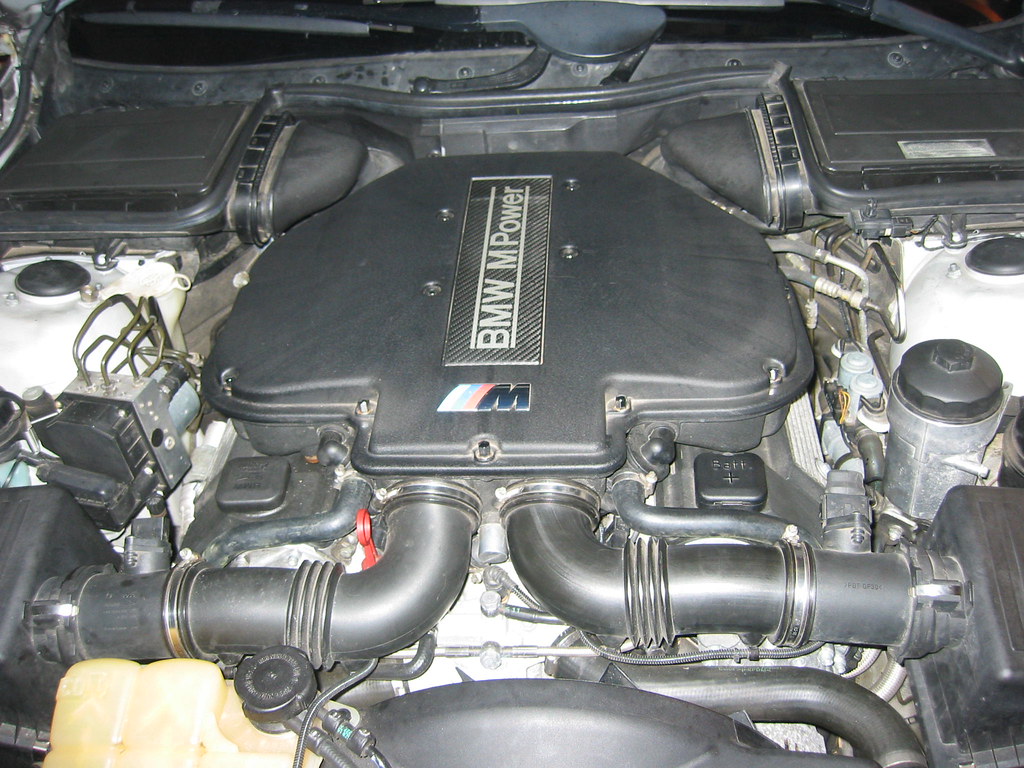
Start – this is how the engine looks like:
<o

> </o
>
<o
> </o
>
- Remove cabin air filter boxes
- Remove cover
- Remove clip and hood switch connector (driver side only)
- Unclip boot to cabin filter housing
- Remove cabin filter housing
- Turn boot upwards (fragile fingers), then remove
- Remove air intake boots, or entire air filter housing cover w/ MAF
- Disconnect MAF connectors
- Pay attention to cables tied to the intake boot (elbow)
- Loosen hose clamp, and remove boot
<o
> </o
>
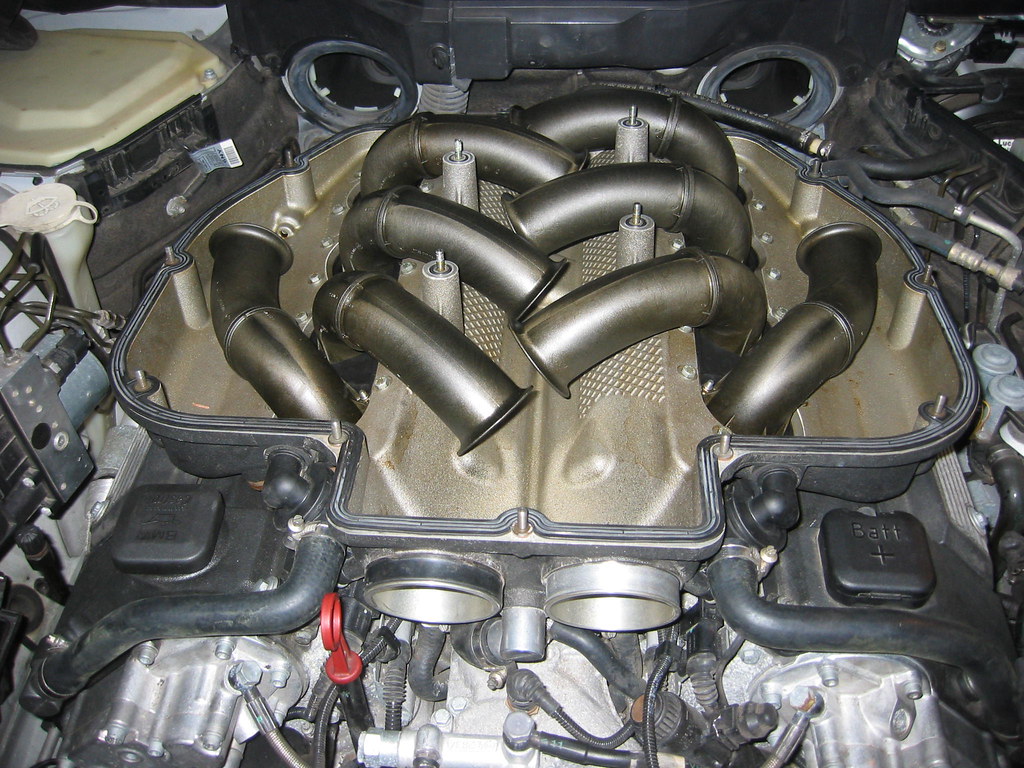
Here’s how it should look like now

<o
> </o
>
- Remove 11 bolts on the plenum cover – DON’T DROP THEM. (size 10)
- installation: torque to 5nm, inside first, then outside. Then to 10nm, inside first, then outside
<o
> </o
>
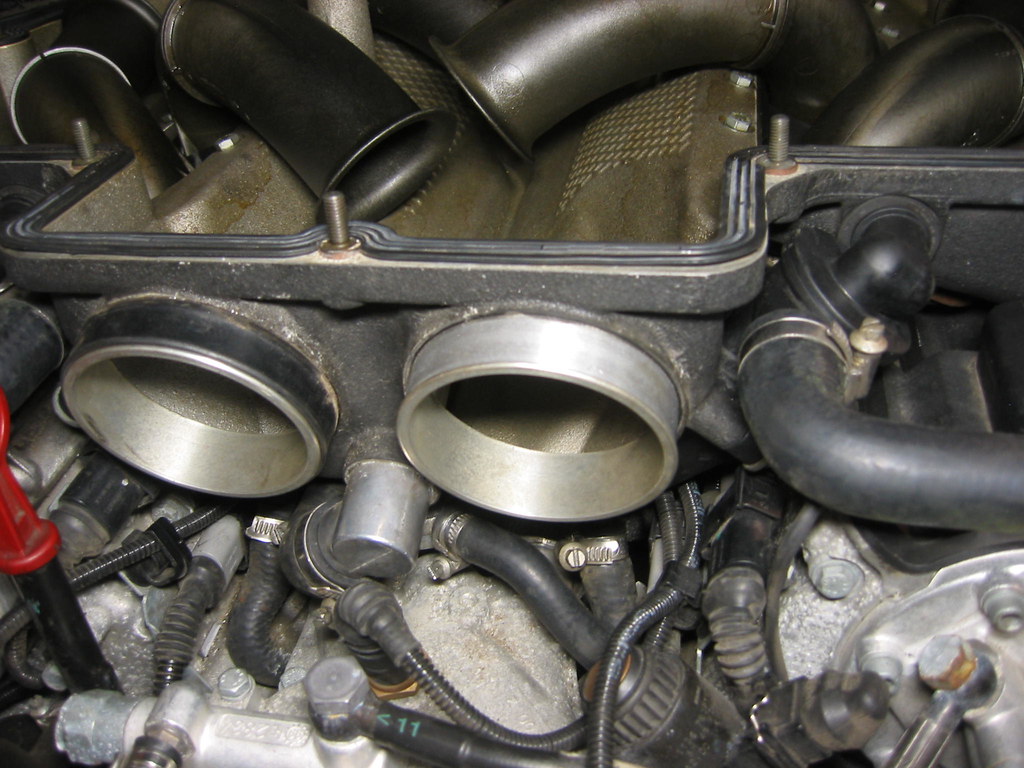
Here’s how it should look like now
<o
> </o
>
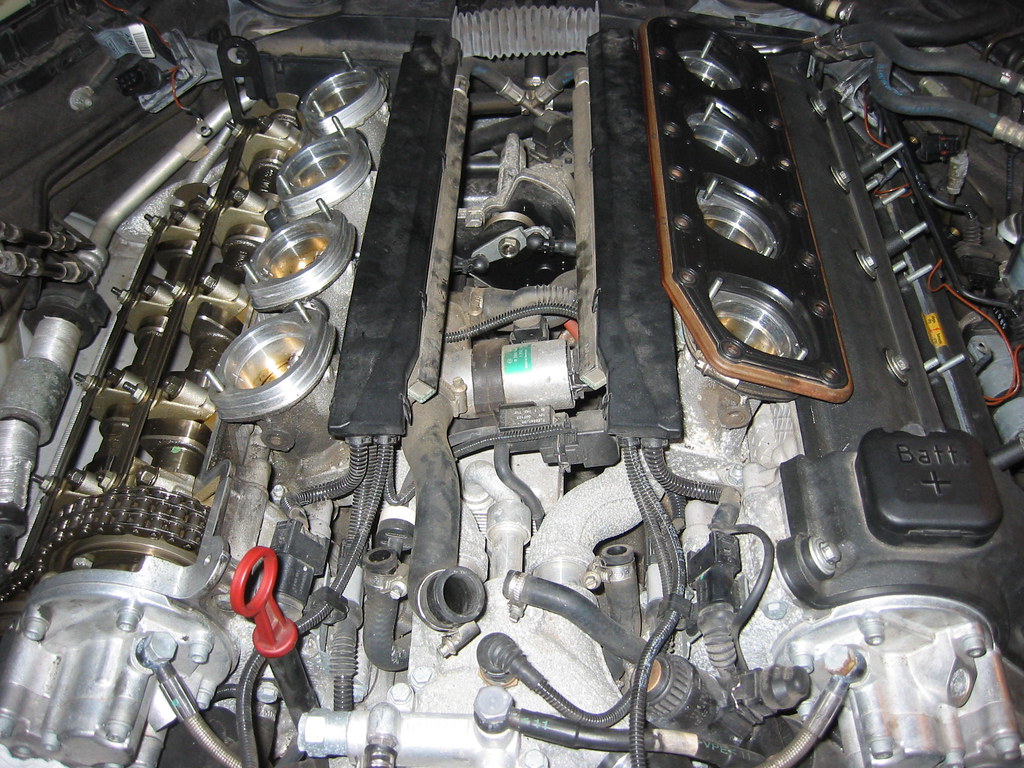
- Remove all the horns (size 8, 2 per horn)
- Cylinder 1 and 5 are unique, all others are identical. Note their orientation, mark them before removing if you want to be safe
- Loosen two screws that hold the oil separator to the plenum housing
- remove (carefully) the oil separator from plenum housing
- loosen hose clamp to the base of the oil separators, remove them (I cleaned mine with carb cleaner, they were filthy)
- loosen hose clamp to the base of the plenum housing
<o
> </o
>
Close up pictures, all 4 hose clamps shown

<o
> </o
>
- Remove screws (LOTS of them) that hold the plenum housing size 10
- 16 on the driver side, 17 on the passenger side
- installation: torque to 5nm, inside first, then outside. Then to 10nm, inside first, then outside
- Wiggle the plenum housing, patiently and slowly, it should detach
- You should remove the intake gaskets at this point. Use a small flathead screw driver to remove hose clamp from the center of the engine
Picture shows passenger side with intake gaskets removed, right side still on. That’s what you see AFTER removing the plenum housing
<o
> </o
>
Everything here on is similar on both sides
- Remove ignition coil cover – 2x 10mm nuts
- Remove all the ignition coils, 2 per coil 10mm nuts
- Remove all ground wires (3x), and the nuts holding the ignition coil wires (2x)
<o
> </o
>
Here’s where you are now:

<o
> </o
>
- Remove a whole bunch of valve cover gasket nuts (DON”T DROP THEM like I did) (10mm, tightening torque 7.5 ft-lb)
- Driver side, remove the battery terminal nut (19mm?). Disconnect <st1lace>Battery</st1lace> in your trunk first.
- Passenger side, remove the oil cap
- Now the fun begin, pull, wiggle, grab from the front of the valve cover (where vent hose goes), and pull, wiggle, swear, pull some more, wiggle, and HOPE it comes off soon.
- When it’s off, you’ll have to carefully pull things off, without scratching too much. Driver side is harder than passenger side – less room
<o
> </o
>
Here’s what you should see on the passenger side when you remove
<o
> </o
>
Valve Cover on the floor
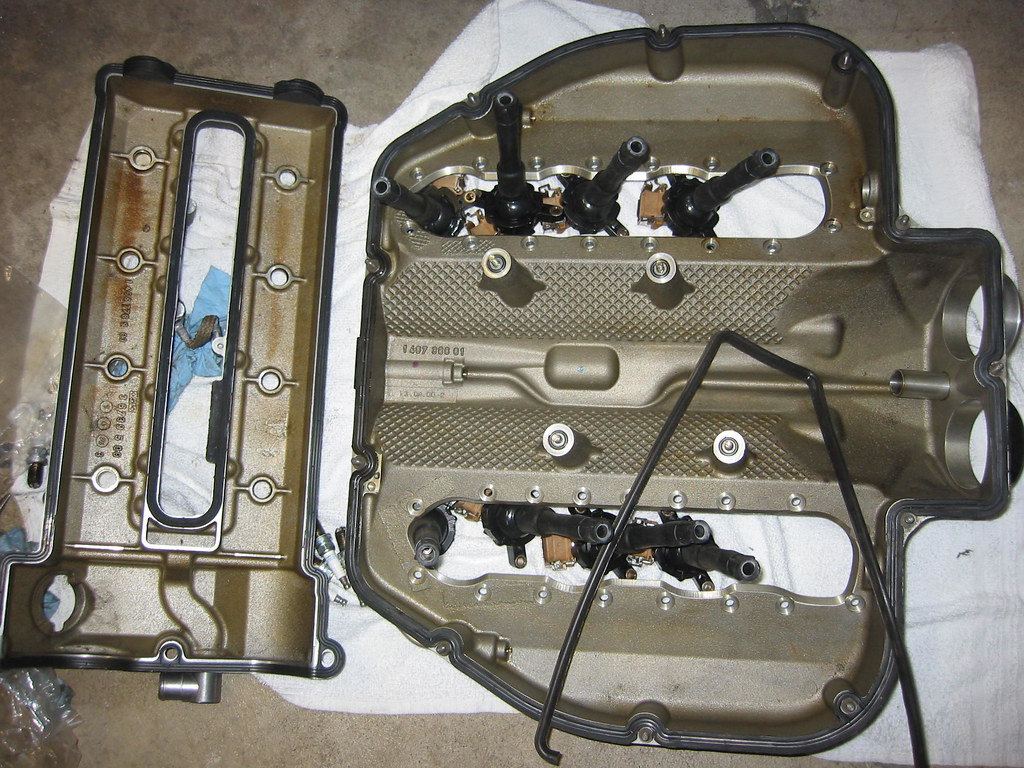
<o
> </o
>
- Clean the grooves on the cover with metal wire brush
- Clean the head joint surfaces with carb cleaner, ensure CLEAN
- Apply silicon at 6 places
- Where Vano housing joins the Head toward the front (2x)
- Each of the 2 corners by the half round toward the back (4x)
<o
> </o
>
Everything is now in reverse order.
<o
> </o
>
See post #14 from M5Joe, that’s what got me thru with this DIY.
<o
> </o
>
Cheers
<o
> </o
>
(Above Drive/Passenger side is based on US LHD model)<o
></o
>


