BMW M5 Forum and M6 Forums banner

Windshield Rubber Seal Replacement

85K views 82 replies 50 participants last post by  thekurgan  
#1 · (Edited)
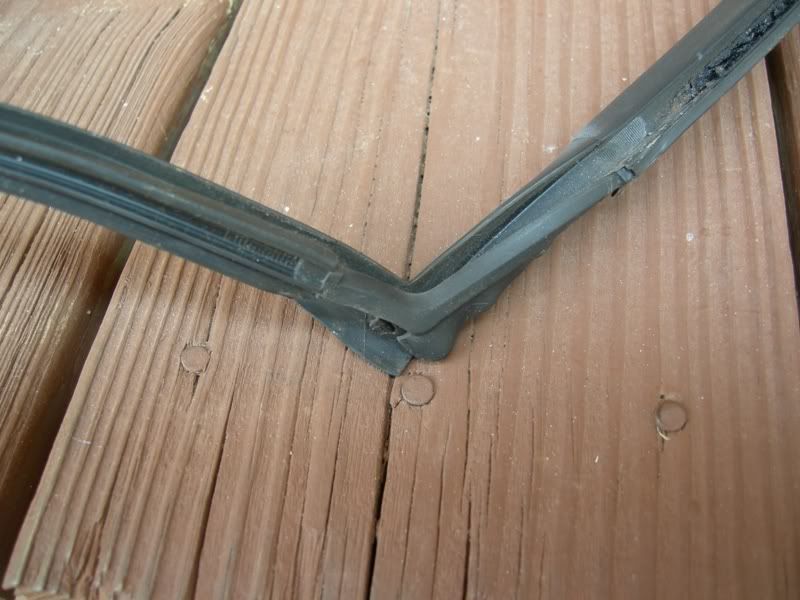
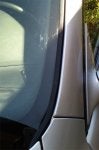
Symptoms - Cracked and chipped windshield rubber seal. For a June 2007 build, the rubber has held up pretty good up until the last few months. It has started to fall apart with the slightest touch (washing the car, etc). From what I've read this is not a weather / rain seal, just a trim part.

Not much discussion on the M5 board, but I did find a big write up on another BMW board; some getting BMWNA involved, some DIY'ers. I decided to give it a shot myself. My local dealer had the part in stock

51 31 8 159 784

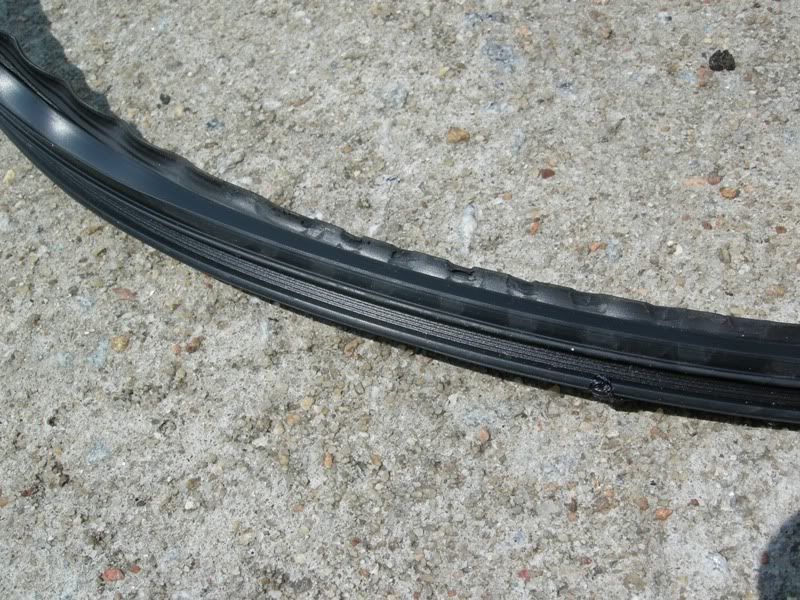
Only $31.26 including tax and he had it in stock. I picked it up yesterday and nervously started last night. First step is removing the old rubber. I used a plastic butter-knife type tool and a Stanley pick tool with a hook on the end. Just pried the passenger side top corner up with the plastic tool and got the hook down in the rubber and worked it up. Suprising how deep the rubber goes down in there. Once you get it started, pulling the whole molding out is a snap, it just pulls out all the way around the windshield. It did leave behind a black, gummy residue in the channel that cleaned up with some WD-40 and several Scott's heavy duty throw away rags.

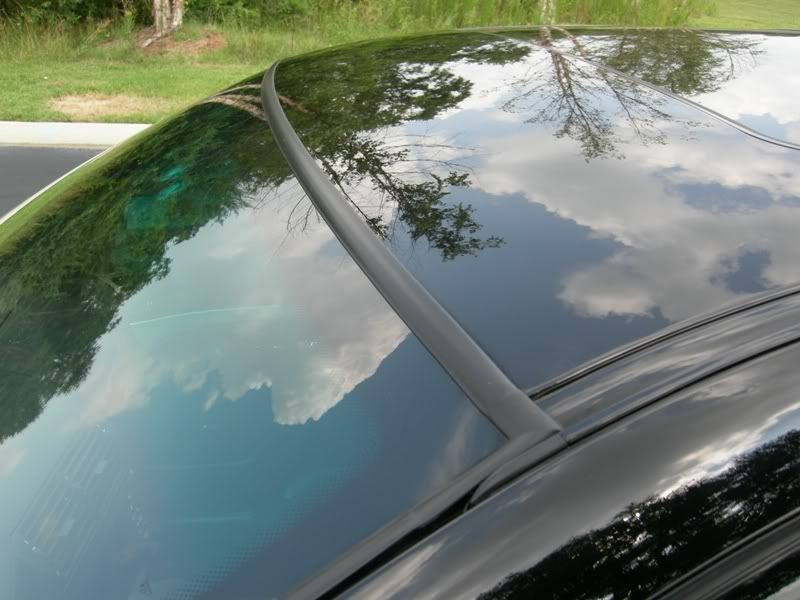
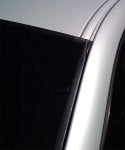
Once the area was all cleaned up it was time to get the new rubber in. I did think I was a little in over my head because the molding looks like it doesn't want to fit in the opening. But I just got it lined up and it pressed in place with thumb pressure. I was really suprised but it snapped into place without much hassle at all. I did the top all the way across then the sides. Pressed it all in place, ran some Gummi-Pflege on it and let it sit overnight.

Cleaned everything off this morning, made sure everything was still in place and it was. Overall the job took about a half hour.

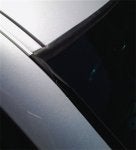
When the rubber started craking I thought I was in for a huge bill or life with a cracked windshield rubber gasket. But this is definately a DIY job. It really improves the appearance of the car and gives it a little "newness".

Pictures to follow...
 
#4 ·
Please do post pics.
Both front and rear rubber seals need replacing on my car. I was told by my SA that the front windsheild must be removed in order to replace the rubber seal. And, that there is a chance that the glass could get cracked in the process. This happens so often, according to my SA, that the windshield people have you sign a waiver and he advised that I have cash set aside to buy a replacment windshield just in case.

Is this really a DIY?
 
#5 ·
Please do post pics.
Both front and rear rubber seals need replacing on my car. I was told by my SA that the front windsheild must be removed in order to replace the rubber seal. And, that there is a chance that the glass could get cracked in the process. This happens so often, according to my SA, that the windshield people have you sign a waiver and he advised that I have cash set aside to buy a replacment windshield just in case.

Is this really a DIY?
Absolutley, positively a DIY. All you need to do is pry under 1 corner of the molding and gently pull up and it comes right out. NEVER during the process did I ever worry about cracking the windshield. I don't see how I could have even if I man-handled the molding out of it's channel.

I don't have pictures of the process (I will post pics of the finished product and the old removed molding), but there's not much to it. Just about a 3/8" gap from the edge of the windshield and the roof/side pillars. I can't see how the windshield would be so brittle that it could be broken removing the molding :dunno:
 
#9 ·
Definitely one of my top list to do...thanks for posting:cheers:
 
#10 ·
this is great news, always assumed the windshield had to come out. Please do post some pics. I need to do this on my 6/00 prod car, it's falling apart as you mention. Would love to do this soon.
thanks for posting!!
 
#11 ·
#14 ·
Step-by-Step Photos

Thanks to BillrM5 for starting the thread and saving us all several hundred dollars each. I was sure this could be replaced without removing the windshield since my service advisor guaranteed me that this was cosmetic and there would be no leakage as the trim continued to deteriorate.

Instructions above are great, so I did mine today and have posted before, after, and during pictures to help the next folks. Having broken a windshield as a teenager many years ago doing a similar replacement on a different car, definitely use a plastic putty knife. It is dead simple. Plastic putty knife, Goo Gone and/or isopropyl alcohol, and some rags. I also found doing it in the sun helped since the new trim piece was softened and very easy to seat.

As noted in other posts, start at the bottom and just peel up and away. Clean the channel well with Goo Gone (I put it on a rag that I ran through on the edge of the putty knife). I then also used compressed air to blow away anything else and finished it off with isopropyl alcohol before the new trim. As the other posts, ensure the top corners are lined up, then seat the top, then the sides. Note the new trim has adhesive, so try to only do it once. Cleaned up any adhesive that rubbed off the new piece with the alcohol and that was it.

Attached see the removal, the clean channel, starting installation (in a corner), and finished version. Also before and after pictures of the driver side and the top. Hopefully these help someone else and you too can spend $40 and some time instead of a windshield replacement.
 

Attachments

#15 ·
Congrats and another successful install...I have to do this asap:D
 
#16 · (Edited)
mjohnson - glad I could help. Your molding was WAY worse than mine, it reminded me of my 1999 528i's molding, chipping away by the day. My molding was in the beginning stages of starting to go.

Very suprising how easy this was to do. For some reason it seems intimidating, but one you get started, its really noting at all. I know M5's are garaged and better maintained that your everyday 5 series car so maybe the problem is not so rampant among M5 owners, but since we're dealing with cars that are turing 7 years old this year, garaged or not it's time to change those windshield moldings :D

Please post if you change yours....
 
#17 ·
i've noted the pn and will pick one up in a day or two! Have a bunch of parts waiting for me at the dealer for the e34, time to give the e39 a little attention. Just in time for the concorso/historics, wont have to have ugly window trim this year! Thanks Bill, i had asked my dealer about this a year or so ago and they said (without looking into it really) that the windshield would have to come out. Glad i can do this myself.
Mike
 
#19 ·
replaced mine this weekend too. Wow, so glad this post came up.
Was driving me crazy every time i washed the car to see a few more chunks of rubber break off, dealer told me it was a windshield out repair, was going to wait and do it with a new windshield at 100k. Took about 30 minutes as others said. Used a rolling pin to smooth it out after pressing it into the channel. Very pleased...

(need to tell my people at the dealership about it too!)
 
#21 ·
I replaced mine a couple of days ago and it took me a couple of minutes (very happy) and I highly suggest to use gloves during install ( the black goo/ adhesive is kinda messy when not handled properly)...
 
#22 ·
Replaced by windshield seal yesterday on my Jan 2000 build. It had cracks and was flaking off at top. Thanks to this board for the instructions. Removal was easy once I got it started out. Installation went even quicker. I purchased from Pelican Parts for $37. Thanks to all who contributed info on replacement. :wroom:
 
#23 ·
One again m5board has saved me a bunch of money. This is truly the best source for M5 info on the planet.

I too replaced my windshield trim, last night in an hour. It took me a little longer because the old trim was SO bad. About 45 minutes of that time was the removal and cleanup. I was really surpprised at how easy it was. I used nothing more than a small screwdriver and thumb pressure.

I started at the top right corner and worked my way across the top first and then down the sides. Just make sure you have the first corner seated tightly. The first time across the top it was about 1/8" short when I got to the other side so I had to pull it back out, get it reseated and do it again. Not difficult, just a dumb mistake. What worked best for me was to get the trim laid in place and then push with my thumbs from the bottom side by the windshield and apply pressure as if trying to roll over towards the roof (or the A pillar when going down the sides). I would describe it as more tucking the trim in rather than pushing or forcing it straight down in to the channel.

My body shop wouldn't touch it because the were afraid they would crack the windshield. They insisted that it would probably have to be removed and told me they would have to call their glass specialist.
 
#26 ·
This is the RealOEM page that indicates which pieces to do front and rear window trim. I am a little confused about what would be necessary for my car. As far as I was aware all of our vehicles, be it 540i or M5 had "Burglarproof Glass". Any clarification on this would be great because I would like to do both windows and door seals all at the same time. Thanks. RealOEM.com BMW E39 M5 GLAZING SINGLE PARTS
 
#27 ·
This is the RealOEM page that indicates which pieces to do front and rear window trim. I am a little confused about what would be necessary for my car. As far as I was aware all of our vehicles, be it 540i or M5 had "Burglarproof Glass". Any clarification on this would be great because I would like to do both windows and door seals all at the same time. Thanks. RealOEM.com BMW E39 M5 GLAZING SINGLE PARTS
Just order the two cheaper parts-covering upper and covering lower. The 'Burglarproof' parts are for are for cars with the bullet resistant glass, which I highly doubt you have.
 
#30 ·
No, it's just the top and sides all one piece.I also notice yesterday about the bottom.Mine is a little crack,but I can still live with it.What I did realized when I worked on it is to slide the bottom end of the rubber seal under a rubber flap or whatever is call,that are at the bottom corners of the windshield.they come from another rubber seal that start there but goes toward the engine compartment.It's about an inch and a half or so.The reason for this is in case they are in bad shape,so you don't break them.I don't recall reading about that,so now you know my next project,as you can imagine mines were in bad shape and I already had the top part on,so they pretty much broke apart.It really doesn't show that much,I will study that project next.I hope this help you a little bit,English is my second language,so I tried my best,Rafael.