BMW M5 Forum and M6 Forums banner

Replaced my fuel tank breather valve, pictures of the job..

25K views 17 replies 14 participants last post by  pantablo  
#1 · (Edited)
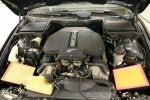
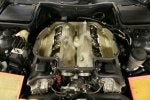
So I finally got around to replacing this PITA valve. Thought I would throw some pictures up of the M5's induction system all taken apart. It is a VERY impressive system to say the least. I was considering doing a write up, but it is a rather complicated job, so I will only head down that road if there is enough interest. Enjoy the pics under the beast's skirt :2:

I also replaced both crankcase breather hoses, thanks Jon@MShop, the hoses were almost eaten all the way through

-Ryan
 

Attachments

#2 ·
Thanks for posting, Ryan. I am glad I didn't attempt it myself as it seems it was more involved than I might have thought (still doable though). My indy shop charged me only an hour for the labor, so happy with that.

I am gonna write the Peake fault codes so when people do a search this thread shows up, pretty valuable as it seems these things go bad chronically.

Peake Fault Code Reader
Table 18
Code E8: Evaporative Emissions Purge Valve
 
#4 · (Edited)
It isn't as dirty as it looks. It is mostly oil, in the channels that are designed to transport the extra oil, I actually questioned the M master tech at my dealer when I was picking up the breather hoses, he said it was perfectly normal.
 
#6 · (Edited)
Hard, no. There are 16 8mm self locking nuts that hold the stacks on, very time consuming. There are also ~30 bolts that hold the lower intake to the manifold, again very time comsuming to put back together. I followed the TIS, they have a very specific order to tighten the 60 some locations. The hardest part is just being careful and not dropping anything into the TB's ouich
 
#8 ·
It is the black unit pictured in one of my close ups. There is no interval. Replace only if it fails.
 
#10 ·
Very impressive it is:cheers:
 
#11 · (Edited)
Great thanks to Fuddy and ard for this and the other post with the .pdfs I ordered my valve today for $55 from the BMW dealer and will takel the job when it comes in.
I have owned my 00 M5 with 59K on it for a little over a month and I knew it was a matter of time before the codes started showing up. Prevoius 5 series are 540 and 528. Hey Fuddy where did you get the manual? I have never heard of the "Mitchell Repair Co."?
 
#12 ·
if you go to http://www.mitchell1.com/AutomotiveRepairSolutions/repair.asp

you can get info on it. It's a bunch of dvd's I got that show you how to repair any modern car. Mechanics and body shops use it.

I did my valve about 2 months ago, but then developed a vaccum leak that is getting repaired today :) so while you're in there, if your vaccum hoses feel britle I would recommend replacing them.
 
#14 ·
Could you please provide the PN of this component?

and just to confirm my understanding before I tackle this.

This is the SAME as the Evaporative Emissions Purge Valve - correct? I have cleaned my MAFs several times, but still getting this error once in a while.

Also, Valve Cover Gasket is NOT necessary, correct? since I have replaced it 30k miles ago, and it seems to be in good shape. I may have to rip everything off just to get this part replaced.

THANKS for the photos!!!

CWY
 
#15 ·
#16 ·
It is a bit of a pain, but manageable

+1 on checking all the oil lines and vaccum lines while you have the plenum off. I have roughly 56k on the clock and my oil lines were squishy and a couple of the small vaccum lines literally crumbled in my hands. Check the FAQ section as there are a couple pretty good DIYs on the evap emissions value. It helps to have small hands and something to pad the car's fender so you don't scratch it (you'll be leaning over the engine for awhile). There are two lines and one electrical connection you have to remove from the valve. The electrical connection is easy - a metal clip slides out (but not off) and then you pull up. The top of the two lines is easy if it isn't broken. There should be a plastic clip that you push in to spread two "ears" that lock the line in place. Mine took a little persuasion with some small channel lock pliers. The line below the valve is just a "slip on" line. I used a small pair of pliers to get a grip on the line and then twisted/pulled for a long time to get it off. Putting it back is worse - again, I used the pliers to grip (but not crush) the line to get it started and then pushed/twisted it back on.

Good luck