

If your mirror has failed you can contact us at sales@radar-mirror.com to arrange for repair. Please mention you saw it on the M5Board.
We've been integrating radar and laser displays for M5board members for a few years now and within the last couple of months began offering a service to repair the BMW mirrors that are so prone to failing. We've learned a few things over the last few weeks and wanted to pass on some insights about why the mirrors fail and some tips to hopefully limit the damage if your mirror suffers the same fate.
How Auto Dimming Mirrors work
An auto dimming mirror is comprised of two pieces of glass that are sealed together along the edges, a conductive gel is then injected and completely fills the area between the two pieces of glass and then sealed at the injection point. The back of the glass is coated with a silver mirror coating and under normal (non dimming) conditions the gel is completely invisible and transparent. The mirror housing contains an electronic circuit board with photosensors that measure ambient light, one facing toward the front of the car and one facing out the rear window. The forward facing sensor tells the mirror whether it's day or night and enables or disables the auto dimming function accordingly. At night when the rear facing sensor detects light the electronic circuit board will begin applying very low levels of voltage to each piece of glass and the conductive gel will begin to darken - effectively reducing the amount of light that hits the mirror coating and eliminating glare.
![Image]()
Why the mirrors fail
The vast majority of the mirrors that have experienced failure were produced between the late 90's and mid 2000's by the Magna Donelly Corporation, the supplier at the time for BMW's rear view mirrors. What happens is the seal along the edge of the glass is breached due to a failure in the material and air will begin to make it's way inside and produce the bubble we're all familiar with. Whether the liquid inside the mirror will begin to leak or how long it takes depends largely on where the breach occurred.. if the breach is on the upper side of the mirror it may take a while for any liquid to make it to the bottom of the case and begin to leak out. If the breach is on the lower portion of the mirror the liquid will escape much more rapidly and since it's directly hitting the bottom of the case you may see it leak the same day the seal is breached. There's a popular misconception that the mirrors first fail and then begin to leak over time and this isn't always the case. Once the seal fails the liquid is escaping and simply following the laws of gravity.
What to do if your mirror fails
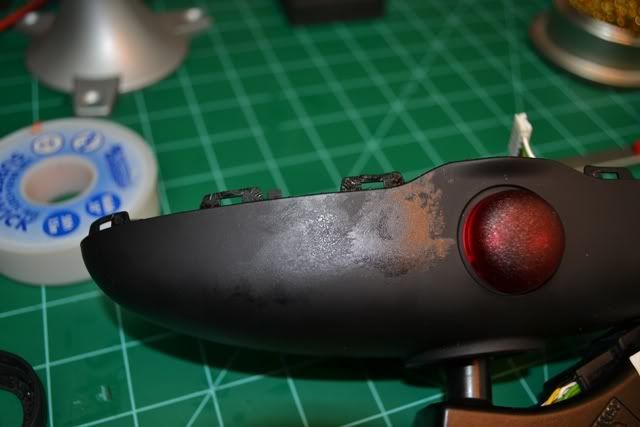
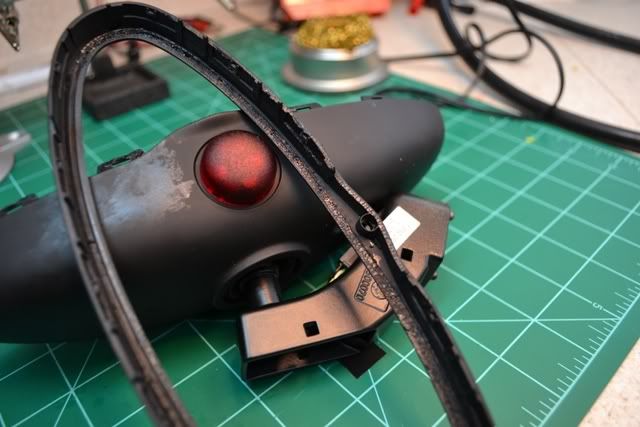
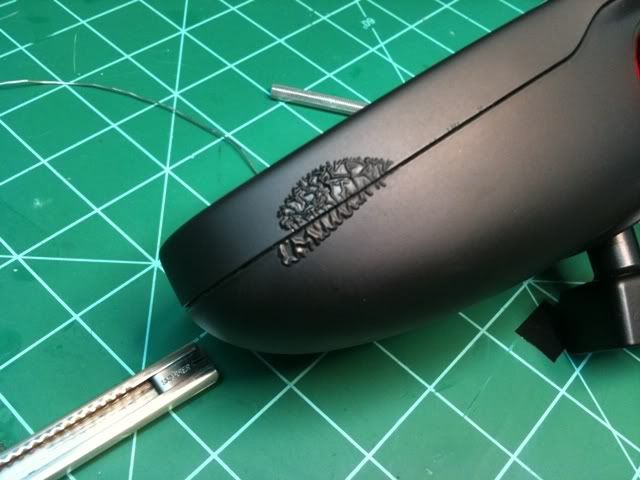
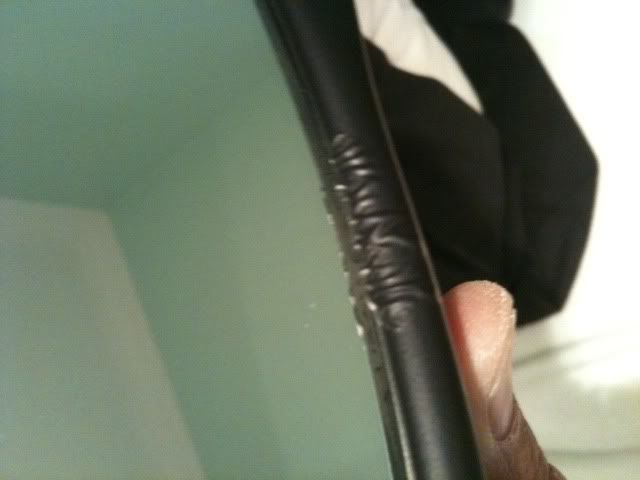
Remove the mirror from your windshield as soon as possible and get it out of the car, it's best to place the mirror face down on a flat surface. Instructions for removing your mirror HERE. If there is any visible signs of the liquid leaking from the mirror clean it off right away and wrap the mirror with an absorbent towel to avoid or limit damage to the case. Many of the mirrors we receive have some visible damage to the case caused the the liquid and in some examples the damage occurred during shipping to our facility as the mirror gets moved around every which way and causes the liquid to spill faster. If there is any sign of the liquid leaking from your mirror prior to shipment you may wrap the seam of the case with a few layers of paper towels and then wrap with tape. Here are some pictures of mirrors that experienced damage to the case during shipment.
![Image]()
![Image]()
![Image]()
![Image]()
We've been integrating radar and laser displays for M5board members for a few years now and within the last couple of months began offering a service to repair the BMW mirrors that are so prone to failing. We've learned a few things over the last few weeks and wanted to pass on some insights about why the mirrors fail and some tips to hopefully limit the damage if your mirror suffers the same fate.
How Auto Dimming Mirrors work
An auto dimming mirror is comprised of two pieces of glass that are sealed together along the edges, a conductive gel is then injected and completely fills the area between the two pieces of glass and then sealed at the injection point. The back of the glass is coated with a silver mirror coating and under normal (non dimming) conditions the gel is completely invisible and transparent. The mirror housing contains an electronic circuit board with photosensors that measure ambient light, one facing toward the front of the car and one facing out the rear window. The forward facing sensor tells the mirror whether it's day or night and enables or disables the auto dimming function accordingly. At night when the rear facing sensor detects light the electronic circuit board will begin applying very low levels of voltage to each piece of glass and the conductive gel will begin to darken - effectively reducing the amount of light that hits the mirror coating and eliminating glare.

Why the mirrors fail
The vast majority of the mirrors that have experienced failure were produced between the late 90's and mid 2000's by the Magna Donelly Corporation, the supplier at the time for BMW's rear view mirrors. What happens is the seal along the edge of the glass is breached due to a failure in the material and air will begin to make it's way inside and produce the bubble we're all familiar with. Whether the liquid inside the mirror will begin to leak or how long it takes depends largely on where the breach occurred.. if the breach is on the upper side of the mirror it may take a while for any liquid to make it to the bottom of the case and begin to leak out. If the breach is on the lower portion of the mirror the liquid will escape much more rapidly and since it's directly hitting the bottom of the case you may see it leak the same day the seal is breached. There's a popular misconception that the mirrors first fail and then begin to leak over time and this isn't always the case. Once the seal fails the liquid is escaping and simply following the laws of gravity.
What to do if your mirror fails
Remove the mirror from your windshield as soon as possible and get it out of the car, it's best to place the mirror face down on a flat surface. Instructions for removing your mirror HERE. If there is any visible signs of the liquid leaking from the mirror clean it off right away and wrap the mirror with an absorbent towel to avoid or limit damage to the case. Many of the mirrors we receive have some visible damage to the case caused the the liquid and in some examples the damage occurred during shipping to our facility as the mirror gets moved around every which way and causes the liquid to spill faster. If there is any sign of the liquid leaking from your mirror prior to shipment you may wrap the seam of the case with a few layers of paper towels and then wrap with tape. Here are some pictures of mirrors that experienced damage to the case during shipment.
")


