Well as promised, I have documented my second install of these LED's into my 2002 M5. I took a chance on these LED's last year on my 540i, not knowing if I was even going to be able to make them work. Well I was, and let me tell you, the results are absolutely AMAZING!!!! They are unbelievable bright, and the response time is just the icing on the cake. I bought the bulbs from theretrofitsource.com, and the are $120 + Shipping.
Prerequisites:
1) You should disable your high beams DRL's! On my 540i this was enabled by default, and I used a cheaper BMW scanner from Amazon to reprogram the LCM and turn it off. You don't necessarily have to turn this off as these bulbs do support DRL function, but it must be between 4v and 9v, and a non-pulsed signal. I have not tested the voltage these car put out for the Highbeam DRL's, so it's up to you to check that if you don't want to disable them. Honestly, I think these will be too blinding, even at DRL voltage, for when it's starting to get dark and you haven't put your headlights on yet.
2) Using the same software, I would also highly recommend you disable the highbeam bulb check. What the LCM does is send a short pulse of voltage to each bulb around the car. If it doesn't see the resistance it's supposed to, it throws a bulb out warning. With these LED's, you won't get a bulb out warning, HOWEVER, since LED's react so fast in comparison to halogen, they will flash periodically when you first start up the car, as the LCM is checking all the exterior bulbs.
Require Tools:
- Flathead screwdriver
- T15 & T20 Torx socket/screwdriver.
- Bench grinder.
- 8mm and 10mm sockets and ratchet, preferable 1/4".
- Hacksaw
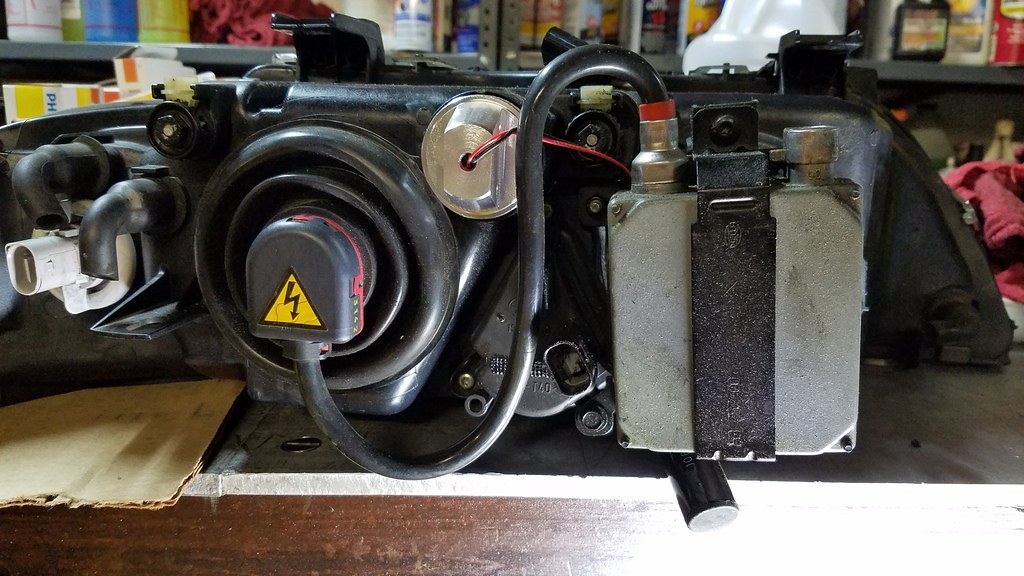
First take off the headlight, and find a table to work on. There are four 8mm bolts holding them onto the car. Then removed the factory HID ballast if your car is equipped with HID's, as the ballast and it's bracket block access to the highbeam bulb. You can take them out as one unit, there are three 8mm bolts holding the HID bracket to the headlight housing.

Next remove your stock highbeam bulb. Twist counter-clockwise, and then it should pull out.

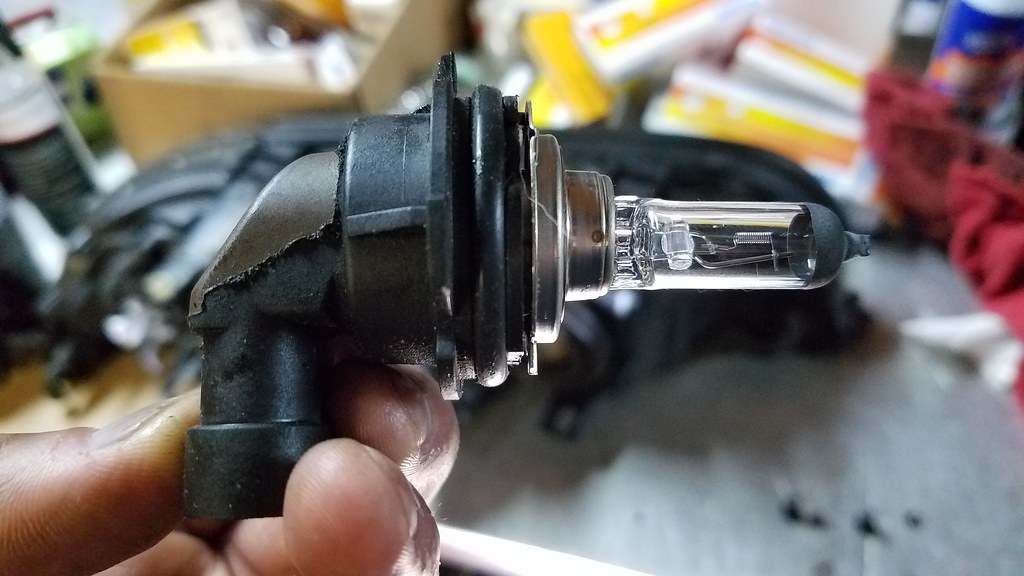
Here is a pic of the factory H7 bulb, next to the morimoto bulb. You can start imagining what we need to do now.
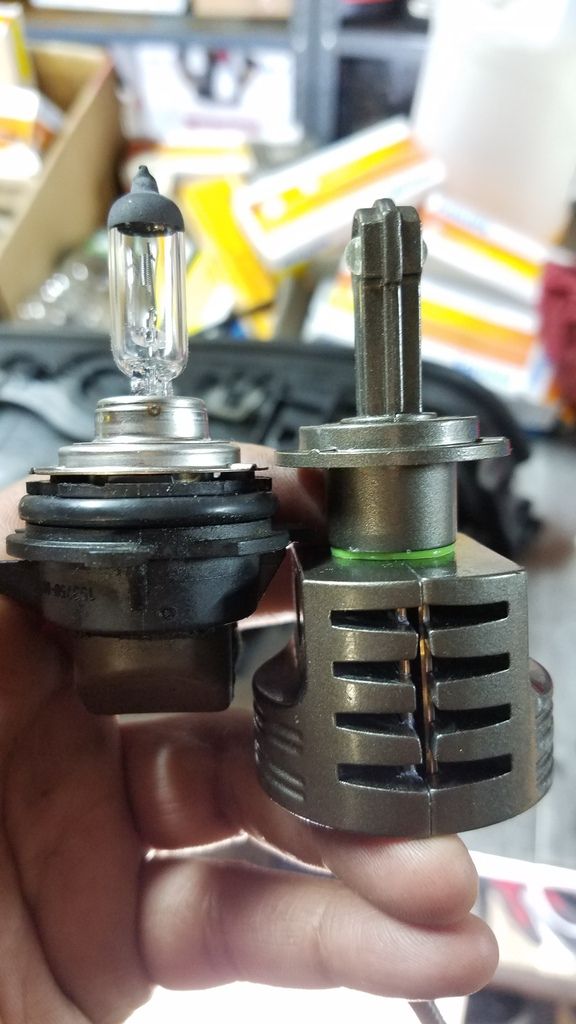
Use the flatblade screwdriver to help you remove the H7 bulb from BMW's H7 adapter. Once again, can you start to see what needs to be done? The morimoto H7 base twists on and off from the housing. What we need to do is to get the factory H7 adapter to sandwich between the morimoto H7 base and it's heatsink. We need to use the BMW adapter because that's what twists into the headlight's twist lock and holds the bulb in place. Once modified to fit in the morimoto bulb, it will then hold that bulb it.

Get your hacksaw, and begin cutting around the base of the factory bulb adapter, where the stock connector plugs into.
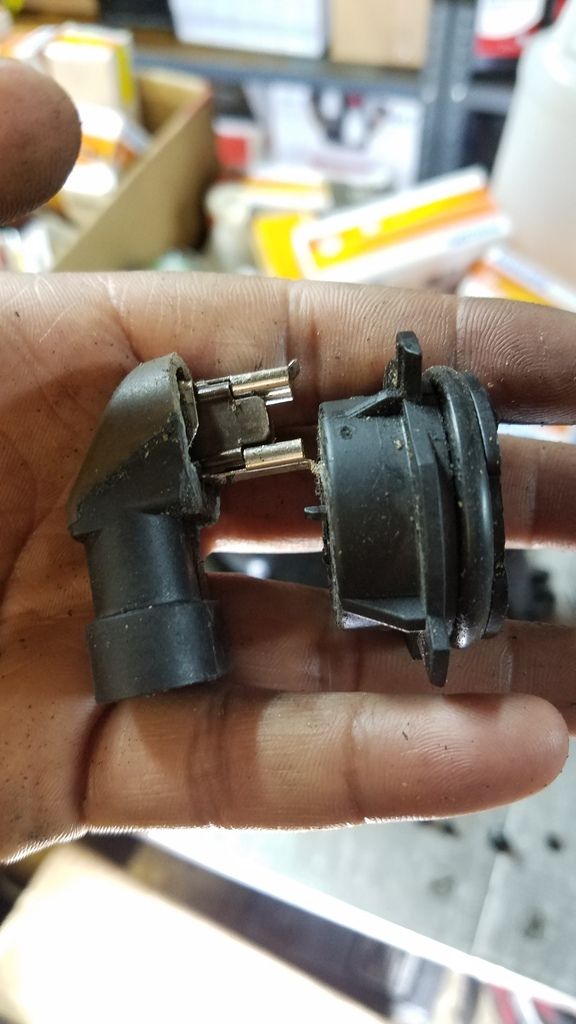
Cut evenly all around, until you can see the electrical pins through the gap.
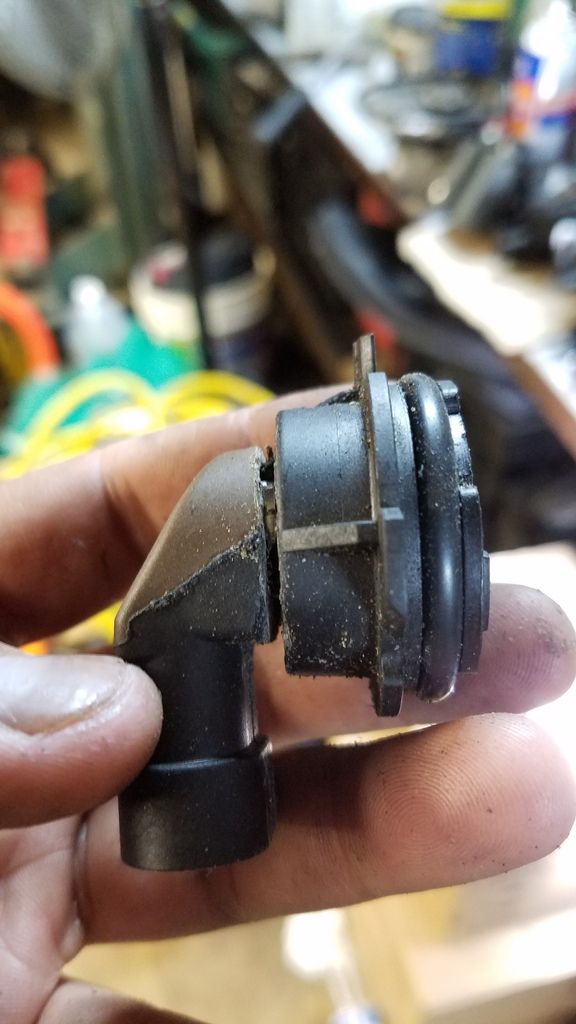
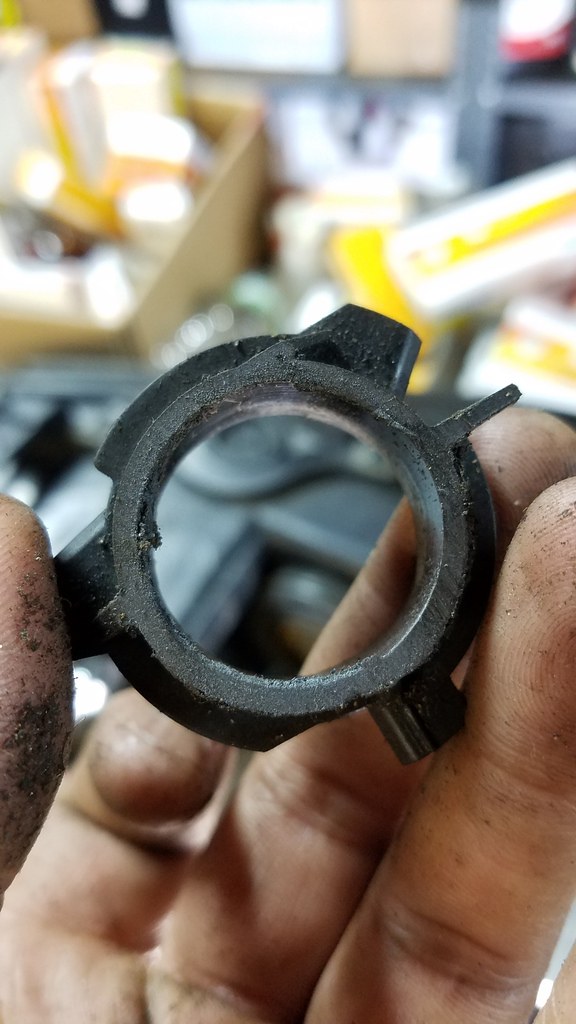
At this point, adapter easily snaps apart.
Here is the cut out portion of the adapter next to the morimoto bulb.
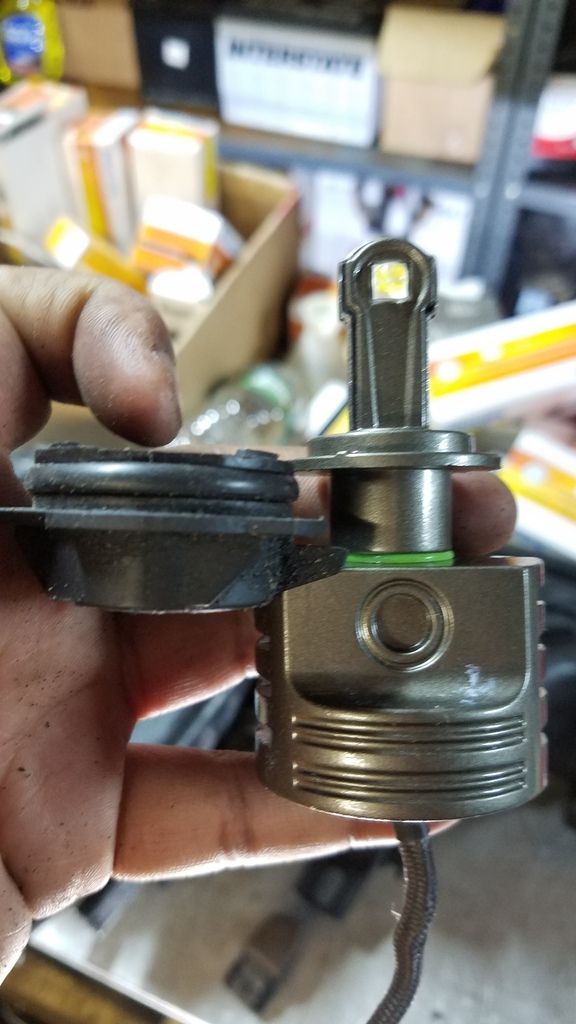
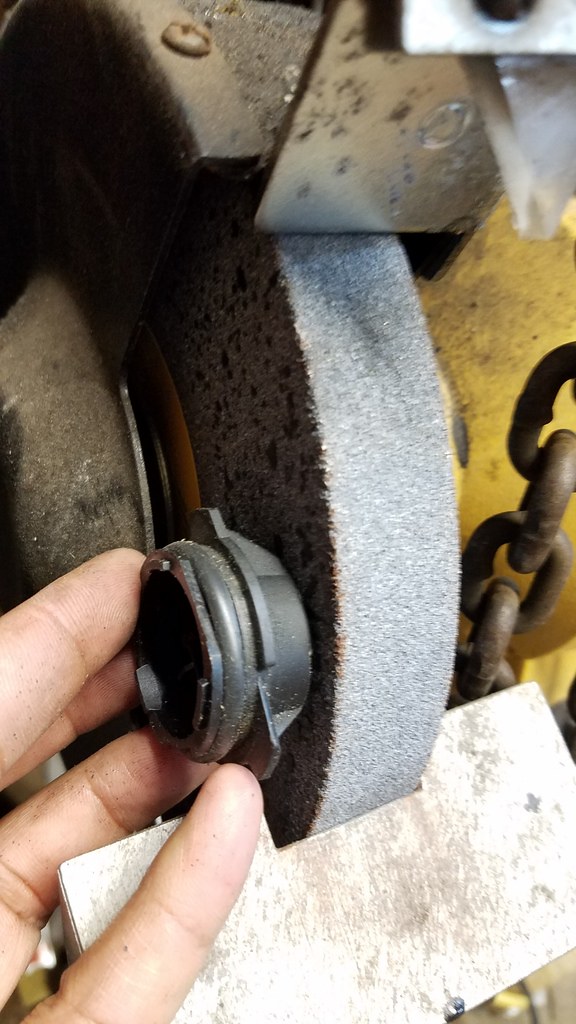
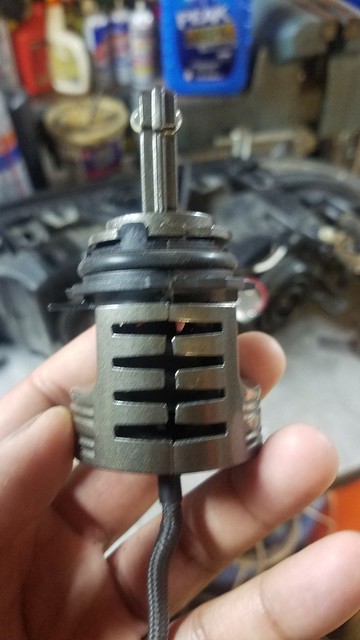
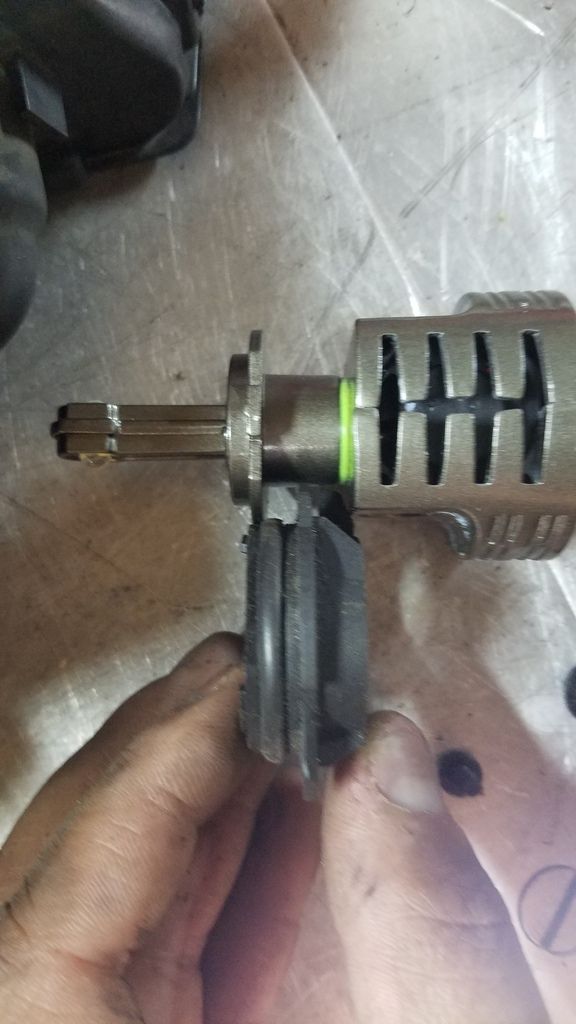
Here is the fun part! you need to grind down the thicker end of the adapter (opposite end of the O-ring), so that it fits inbetween the morimoto h7 base and heatsink. TAKE YOUR TIME. You don't want to grind too much and it end up being too loose inbetween the morimoto base and heatsink!
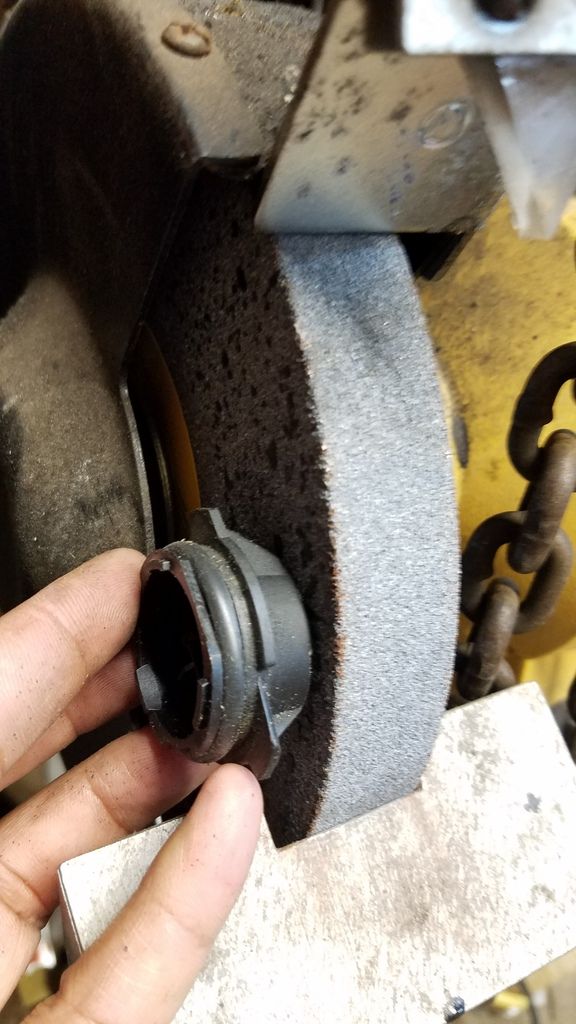

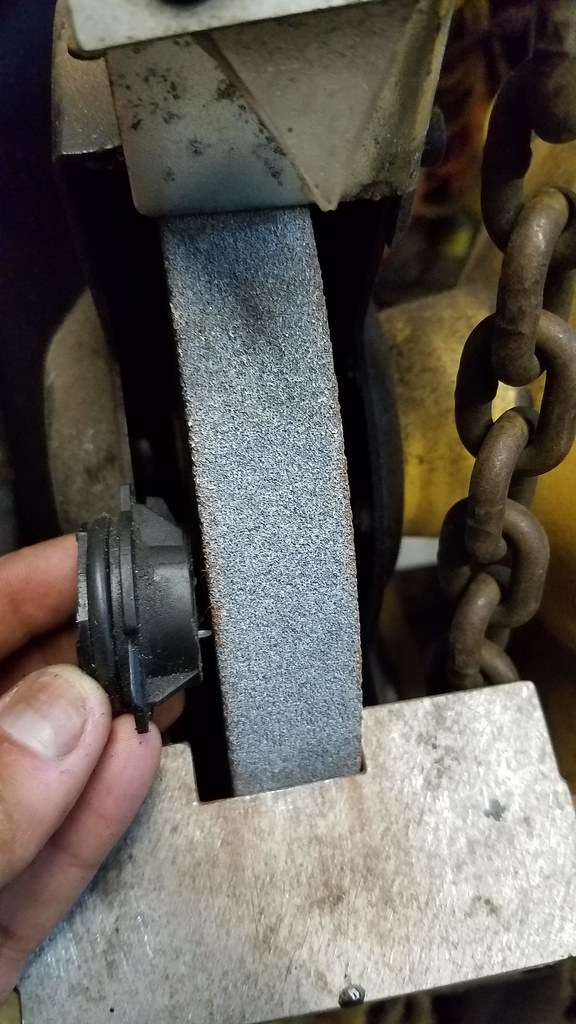
Almost there! Remember as you get closer to it fitting, slow down how much you're cutting so it's not too loose.

Done!
VIDEO OF FINISHED BULBS AND ORIENTATION
HOW TO LOOSEN HEADLIGHT TWIST LOCK AND INSTALL BULBS
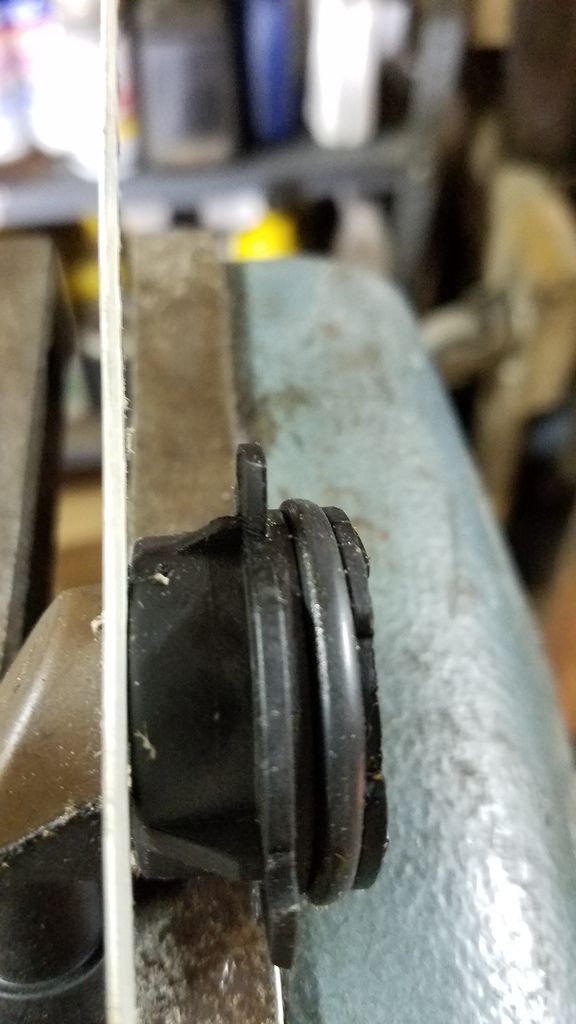
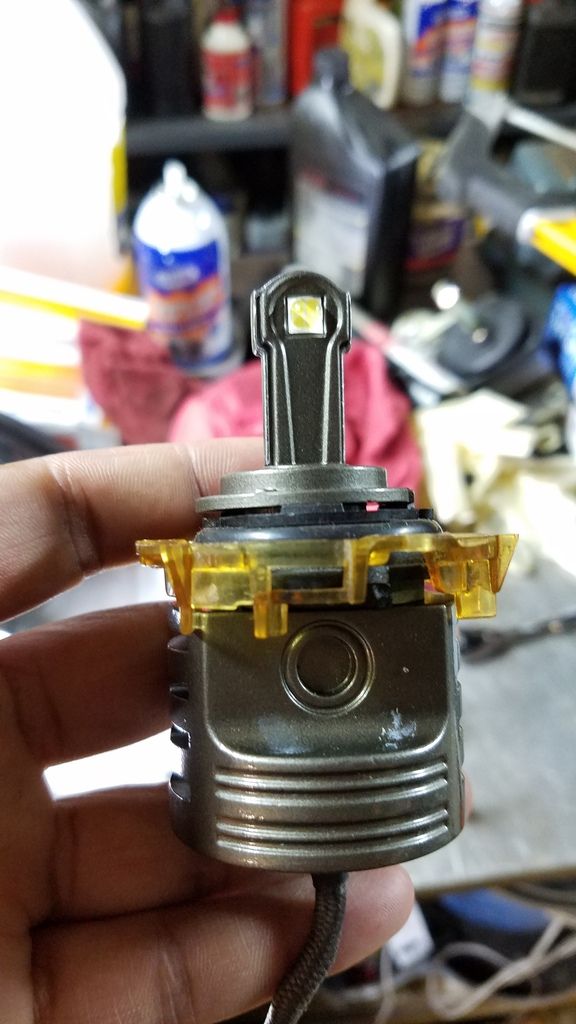
Here is the adapter and twist lock fitted into the morimoto bulb. In the video I stated that you can just loosen the twist lock, and have enough room to install the bulb and then tighten it back down. However, I found it difficult to lock in the bulb without spinning the adapter on the morimoto bulb. So I just unscrewed the twist lock piece from the headlight, installed it onto the adapter on the bulb, and installed everything as one unit.
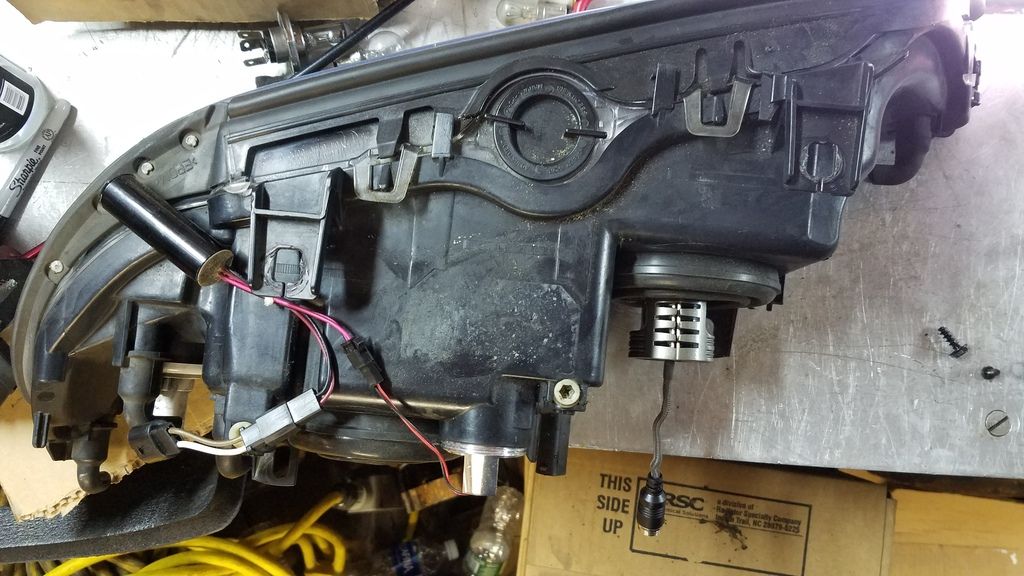
Installed, tight and sealed.

And here is a video of how fast they are, and a little bit of the output too I guess.
CLICK HERE FOR VIDEO
I am waiting for some more of my videos to upload, and I will update the thread later on. In the meantime, enjoy!
EDIT: Here's a video of them in action from the front of the car!
VIDEO OF MORIMOTO LED VS HALOGEN
Chris
Prerequisites:
1) You should disable your high beams DRL's! On my 540i this was enabled by default, and I used a cheaper BMW scanner from Amazon to reprogram the LCM and turn it off. You don't necessarily have to turn this off as these bulbs do support DRL function, but it must be between 4v and 9v, and a non-pulsed signal. I have not tested the voltage these car put out for the Highbeam DRL's, so it's up to you to check that if you don't want to disable them. Honestly, I think these will be too blinding, even at DRL voltage, for when it's starting to get dark and you haven't put your headlights on yet.
2) Using the same software, I would also highly recommend you disable the highbeam bulb check. What the LCM does is send a short pulse of voltage to each bulb around the car. If it doesn't see the resistance it's supposed to, it throws a bulb out warning. With these LED's, you won't get a bulb out warning, HOWEVER, since LED's react so fast in comparison to halogen, they will flash periodically when you first start up the car, as the LCM is checking all the exterior bulbs.
Require Tools:
- Flathead screwdriver
- T15 & T20 Torx socket/screwdriver.
- Bench grinder.
- 8mm and 10mm sockets and ratchet, preferable 1/4".
- Hacksaw
First take off the headlight, and find a table to work on. There are four 8mm bolts holding them onto the car. Then removed the factory HID ballast if your car is equipped with HID's, as the ballast and it's bracket block access to the highbeam bulb. You can take them out as one unit, there are three 8mm bolts holding the HID bracket to the headlight housing.

Next remove your stock highbeam bulb. Twist counter-clockwise, and then it should pull out.

Here is a pic of the factory H7 bulb, next to the morimoto bulb. You can start imagining what we need to do now.

Use the flatblade screwdriver to help you remove the H7 bulb from BMW's H7 adapter. Once again, can you start to see what needs to be done? The morimoto H7 base twists on and off from the housing. What we need to do is to get the factory H7 adapter to sandwich between the morimoto H7 base and it's heatsink. We need to use the BMW adapter because that's what twists into the headlight's twist lock and holds the bulb in place. Once modified to fit in the morimoto bulb, it will then hold that bulb it.

Get your hacksaw, and begin cutting around the base of the factory bulb adapter, where the stock connector plugs into.

Cut evenly all around, until you can see the electrical pins through the gap.

At this point, adapter easily snaps apart.

Here is the cut out portion of the adapter next to the morimoto bulb.

Here is the fun part! you need to grind down the thicker end of the adapter (opposite end of the O-ring), so that it fits inbetween the morimoto h7 base and heatsink. TAKE YOUR TIME. You don't want to grind too much and it end up being too loose inbetween the morimoto base and heatsink!


Almost there! Remember as you get closer to it fitting, slow down how much you're cutting so it's not too loose.


Done!
VIDEO OF FINISHED BULBS AND ORIENTATION
HOW TO LOOSEN HEADLIGHT TWIST LOCK AND INSTALL BULBS
Here is the adapter and twist lock fitted into the morimoto bulb. In the video I stated that you can just loosen the twist lock, and have enough room to install the bulb and then tighten it back down. However, I found it difficult to lock in the bulb without spinning the adapter on the morimoto bulb. So I just unscrewed the twist lock piece from the headlight, installed it onto the adapter on the bulb, and installed everything as one unit.

Installed, tight and sealed.


And here is a video of how fast they are, and a little bit of the output too I guess.
CLICK HERE FOR VIDEO
I am waiting for some more of my videos to upload, and I will update the thread later on. In the meantime, enjoy!
EDIT: Here's a video of them in action from the front of the car!
VIDEO OF MORIMOTO LED VS HALOGEN
Chris