

A little write up of something I finished in January (but never got around to writing). It's not of any particular importance, I just wanted to sort better nozzles for the car. If anyone else feels the same, this might help them get both reservoirs running through single inlet nozzles.
Soon after buying the car I modified the windscreen wiper arms so that they could take the E60 flat blades, which basically meant splicing the right hand e60 arm onto the e39 linkage. The left hand e60 arm only needed to be bent to fit. This bought the wipers bang on up to date, I prefer the newer style blades, I find that they work better.
There's a how to and thread about it here:
Aero wiper project. Now finished with 'how to' guide! - E39 1996-2004 - BMW 5 Series Owners Board - Page 2
Having done this and being very pleased with the result, I turned my attention to the washer nozzles.
On previous cars it's been very easy to change the washer 'jets' for 'fan' versions. I prefer the fan type as they cover most of the windscreen, meaning better coverage and better cleaning. They eliminate the concentrated spots on the screen and allow the screenwash to do it's job.
The M5 has the old fashioned washer 'jet' nozzles, that spray two thin jets onto the screen each side.
I investigated the standard nozzles.
They have two inlets, one for the standard screenwash and another for the intensive screenwash. Upon disassembly, both of these inlets have their own non-return (or one-way) valves.
Considering this, each inlet requires it's own valve to stop any of the 'pumped' fluid from flowing to the 'other' reservoir.
A lowly single inlet standard nozzle was also investigated and found to be much the same as the two inlet type, only it has one inlet section. The innards and valves are the same (and have two valves iirc).
I looked at how the e60 sprays screenwash and decided it was enough of a fan for me.
I presumed that the e60 nozzles would have the same setup with regards to the inlet nozzles, so I ordered two new ones. I was wrong on this part, they have changed the shape of the bottom of the nozzle.
I had thought of transferring the twin inlet portion from my old ones to the new ones. Upon their receipt I immediately saw that they were a different shape, so the idea of swapping inlets was out of the window. The new ones have one 'non-return' valve too.
I fitted the new nozzles using a multitude of pipes and connections and four non-return valves (I had one pipe from each reservoir coming up under the bonnet, both splitting to feed each nozzle. At the nozzles the pipes from each reservoir went through a non-return valve then through a Y connector to connect up to the single inlet washer nozzle). This was a mess and didn't allow a good flow of the screenwash - remember that the nozzles have also a non-return valve built in.
I tried re-arranging things a bit, having a non-return valve closer to each reservoir, then through a Y connector (joining), up to the bonnet then splitting again for the nozzles. This was a cosmetic improvement, but again didn't flow well, this configuration would have been ok if I could have found some very free flowing non-return valves (low crack pressure was the main requirement and difficult to find for 6mm tubing with screenwash as the medium). As it was, I hadn't improved on it's performance and fluid tended to dribble out! No good.
So I thought about it for a while, then a bit more then some more again (these things take time!!).
Finally, I came up with my current solution, which I think is quite elegant and may well be similar to how someone at the factory would have solved it (a bit over engineered and adding complexity!).
I realised that both screenwash pumps do not work at the same time under normal circumstances (I think you might be able to force it by running the intensive pump and then immediately pulling the stalk to run the main reservoir pump, but this wouldn't last long - so shouldn't be a problem. I need to test this to see if this is possible - it might not be allowed by the ecu as both pumps are 'controlled').
Now I have both reservoirs feeding to an electrically controlled solenoid valve, who's action is basically that of a non-mixing diverter valve. One pipe carries the screenwash from the valve to the bonnet where it is split to feed both nozzles.
When not energised, the valve allows flow directly from the main reservoir up to the nozzles, it just flows through it. This is what's required most of the time, so the valve doesn't get used every time I wash the screen.
When energised, it switches (or diverts) the flow, shutting off the main reservoir and allowing the intensive screenwash to pass through. To do this I used the intensive pump electrical feed to energise the valve.
It works well, just as I wanted.
I was recommended a VX3222N-12Vdc valve by Connection Developments (www.solenoidvalvesuk.com) and
(http://www.solenoidvalvesuk.com/catalogue/filecatalog/34%20VX%202010.pdf) for a very reasonable £25 or so. It was great talking with them there, they followed my requirements and immediately understood. It was Graham Williams whom I dealt with, but I'm sure the other staff are just as good.
Everything fits nicely under the bonnet. I made up a bracket that held the valve in the region where the old obd connector used to be on earlier cars and used various connectors to join up the piping.
I bought plenty of black PU 6mm piping from ebay to replace the old, split prone pipes on the car.
I used push fit 'speed connectors' as they work well, are easily separated and are available in different configurations (angles/threads etc).
Whilst connecting the solenoid, I used a reverse biased diode (like what you use with a motor to shunt off back emf) and a rather big capacitor to dampen down the voltage spike produced from the coil (decaying magnetic field generates a voltage/current, without anything connected to reduce this I was getting around 400v in testing! Now it's down to about 13v max. All this was fitted in the solenoid housing or the wiring).
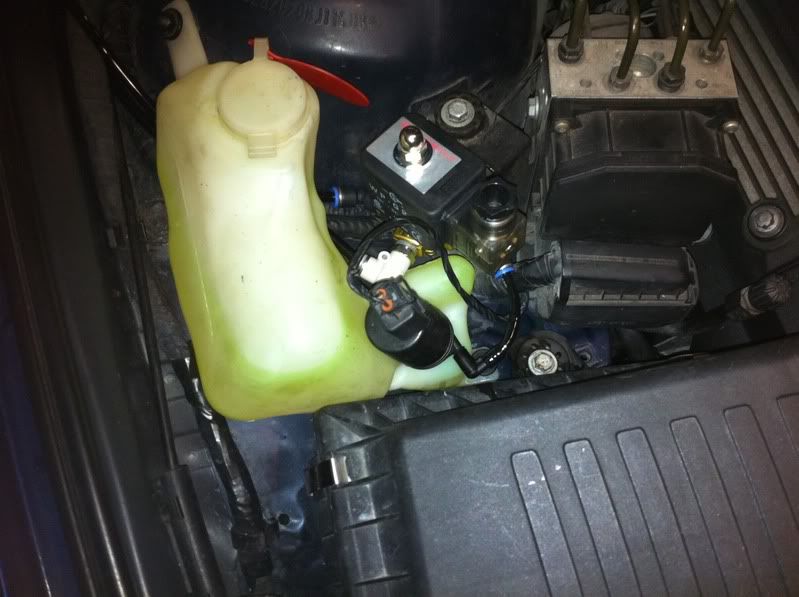
Here are some mobile phone pictures (sorry for the quality):
Fitting pipes:
![Image]()
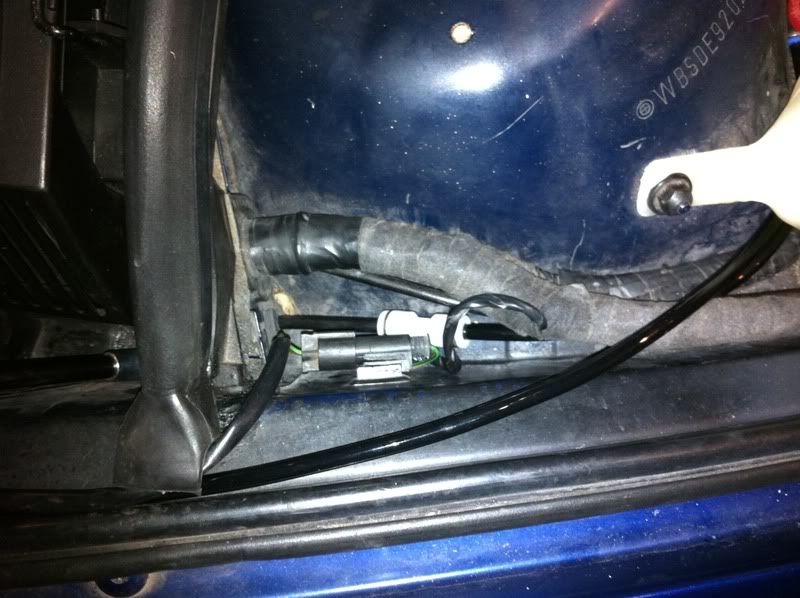
Using a straight through connector, very handy:
![Image]()
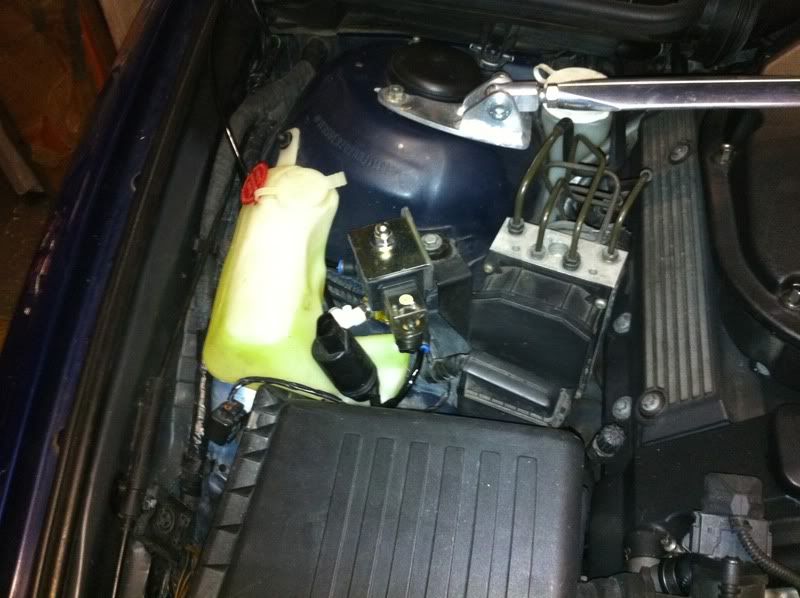
Testing bracket fit:
![Image]()
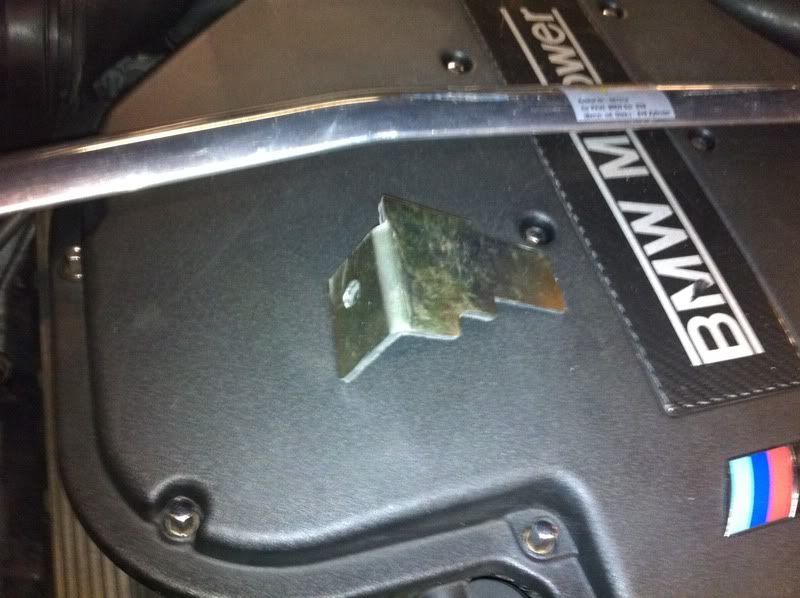
General bracket shape:
![Image]()
All fitted and wired up:
![Image]()
I hope this will come in handy for anyone who want's to ditch the old jets, get some fan nozzles and retain the intensive wash.
Any questions or if I can help in any way, please get in touch.
Soon after buying the car I modified the windscreen wiper arms so that they could take the E60 flat blades, which basically meant splicing the right hand e60 arm onto the e39 linkage. The left hand e60 arm only needed to be bent to fit. This bought the wipers bang on up to date, I prefer the newer style blades, I find that they work better.
There's a how to and thread about it here:
Aero wiper project. Now finished with 'how to' guide! - E39 1996-2004 - BMW 5 Series Owners Board - Page 2
Having done this and being very pleased with the result, I turned my attention to the washer nozzles.
On previous cars it's been very easy to change the washer 'jets' for 'fan' versions. I prefer the fan type as they cover most of the windscreen, meaning better coverage and better cleaning. They eliminate the concentrated spots on the screen and allow the screenwash to do it's job.
The M5 has the old fashioned washer 'jet' nozzles, that spray two thin jets onto the screen each side.
I investigated the standard nozzles.
They have two inlets, one for the standard screenwash and another for the intensive screenwash. Upon disassembly, both of these inlets have their own non-return (or one-way) valves.
Considering this, each inlet requires it's own valve to stop any of the 'pumped' fluid from flowing to the 'other' reservoir.
A lowly single inlet standard nozzle was also investigated and found to be much the same as the two inlet type, only it has one inlet section. The innards and valves are the same (and have two valves iirc).
I looked at how the e60 sprays screenwash and decided it was enough of a fan for me.
I presumed that the e60 nozzles would have the same setup with regards to the inlet nozzles, so I ordered two new ones. I was wrong on this part, they have changed the shape of the bottom of the nozzle.
I had thought of transferring the twin inlet portion from my old ones to the new ones. Upon their receipt I immediately saw that they were a different shape, so the idea of swapping inlets was out of the window. The new ones have one 'non-return' valve too.
I fitted the new nozzles using a multitude of pipes and connections and four non-return valves (I had one pipe from each reservoir coming up under the bonnet, both splitting to feed each nozzle. At the nozzles the pipes from each reservoir went through a non-return valve then through a Y connector to connect up to the single inlet washer nozzle). This was a mess and didn't allow a good flow of the screenwash - remember that the nozzles have also a non-return valve built in.
I tried re-arranging things a bit, having a non-return valve closer to each reservoir, then through a Y connector (joining), up to the bonnet then splitting again for the nozzles. This was a cosmetic improvement, but again didn't flow well, this configuration would have been ok if I could have found some very free flowing non-return valves (low crack pressure was the main requirement and difficult to find for 6mm tubing with screenwash as the medium). As it was, I hadn't improved on it's performance and fluid tended to dribble out! No good.
So I thought about it for a while, then a bit more then some more again (these things take time!!).
Finally, I came up with my current solution, which I think is quite elegant and may well be similar to how someone at the factory would have solved it (a bit over engineered and adding complexity!).
I realised that both screenwash pumps do not work at the same time under normal circumstances (I think you might be able to force it by running the intensive pump and then immediately pulling the stalk to run the main reservoir pump, but this wouldn't last long - so shouldn't be a problem. I need to test this to see if this is possible - it might not be allowed by the ecu as both pumps are 'controlled').
Now I have both reservoirs feeding to an electrically controlled solenoid valve, who's action is basically that of a non-mixing diverter valve. One pipe carries the screenwash from the valve to the bonnet where it is split to feed both nozzles.
When not energised, the valve allows flow directly from the main reservoir up to the nozzles, it just flows through it. This is what's required most of the time, so the valve doesn't get used every time I wash the screen.
When energised, it switches (or diverts) the flow, shutting off the main reservoir and allowing the intensive screenwash to pass through. To do this I used the intensive pump electrical feed to energise the valve.
It works well, just as I wanted.
I was recommended a VX3222N-12Vdc valve by Connection Developments (www.solenoidvalvesuk.com) and
(http://www.solenoidvalvesuk.com/catalogue/filecatalog/34%20VX%202010.pdf) for a very reasonable £25 or so. It was great talking with them there, they followed my requirements and immediately understood. It was Graham Williams whom I dealt with, but I'm sure the other staff are just as good.
Everything fits nicely under the bonnet. I made up a bracket that held the valve in the region where the old obd connector used to be on earlier cars and used various connectors to join up the piping.
I bought plenty of black PU 6mm piping from ebay to replace the old, split prone pipes on the car.
I used push fit 'speed connectors' as they work well, are easily separated and are available in different configurations (angles/threads etc).
Whilst connecting the solenoid, I used a reverse biased diode (like what you use with a motor to shunt off back emf) and a rather big capacitor to dampen down the voltage spike produced from the coil (decaying magnetic field generates a voltage/current, without anything connected to reduce this I was getting around 400v in testing! Now it's down to about 13v max. All this was fitted in the solenoid housing or the wiring).
Here are some mobile phone pictures (sorry for the quality):
Fitting pipes:
Using a straight through connector, very handy:
Testing bracket fit:
General bracket shape:
All fitted and wired up:

I hope this will come in handy for anyone who want's to ditch the old jets, get some fan nozzles and retain the intensive wash.
Any questions or if I can help in any way, please get in touch.


