This thread is actually a follow up to my initial problem found here: http://www.m5board.com/vbulletin/e39-m5-e52-z8-discussion/198143-issue-dot-matrix-backlighting.html
Well This was the initial problem:
![Image]()
To recap, the illumination behind the odometer went out, and I wanted to see if I can fix it.
So, I decided to remove my cluster and see if a burnt bulb was the culprit!
This is my first DIY write up, I wasn't sure if this topic was covered, and I hope it is clear and concise enough so that it isn't confusing.
Tools you will need: philips head screwdriver, torx T-10 screwdriver, and some elbow grease.
BUT BEFORE WE START! HERE IS A DISCLAIMER!
When you remove the cluster, it WILL reset your OBC!! Meaning all your MPG calcs, mileage, auxiliary vent time, speed limit notifications, etc. will be lost! Along with seating memories, and your trip odometer!
If you're okay with this, then let's begin!
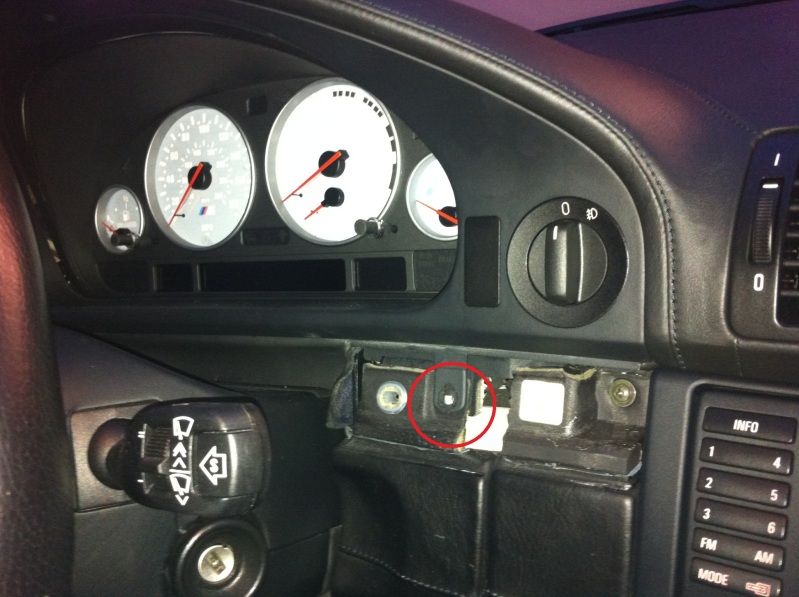
1. Remove the interior trim beneath the gauge cluster unplug the TPMS switch (if you have one), and you will find three (3) Philips screws, remove them:
one (1) on the right side of the steering column :
![Image]()
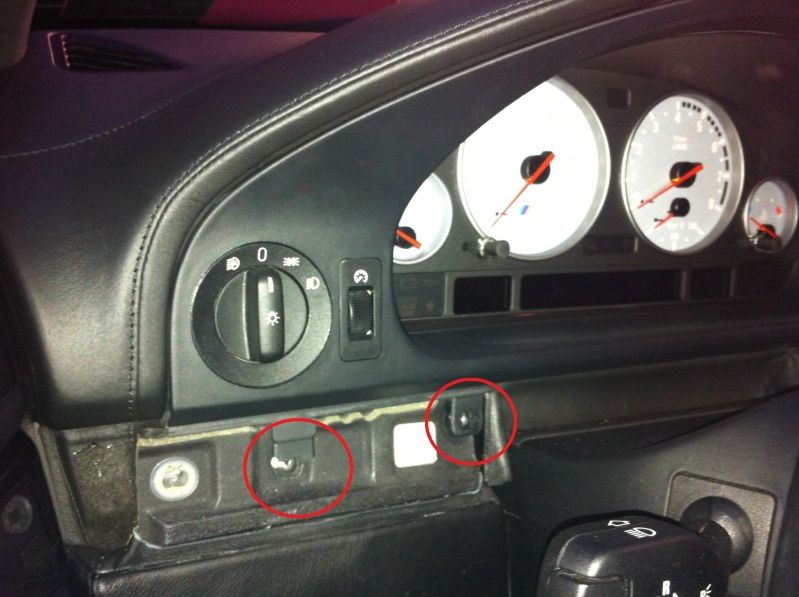
and two (2) on the left hand side.
![Image]()
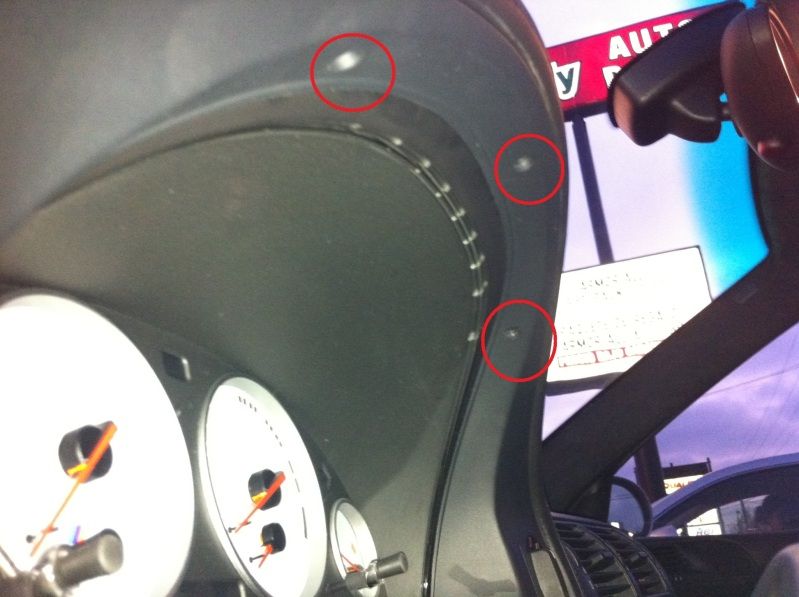
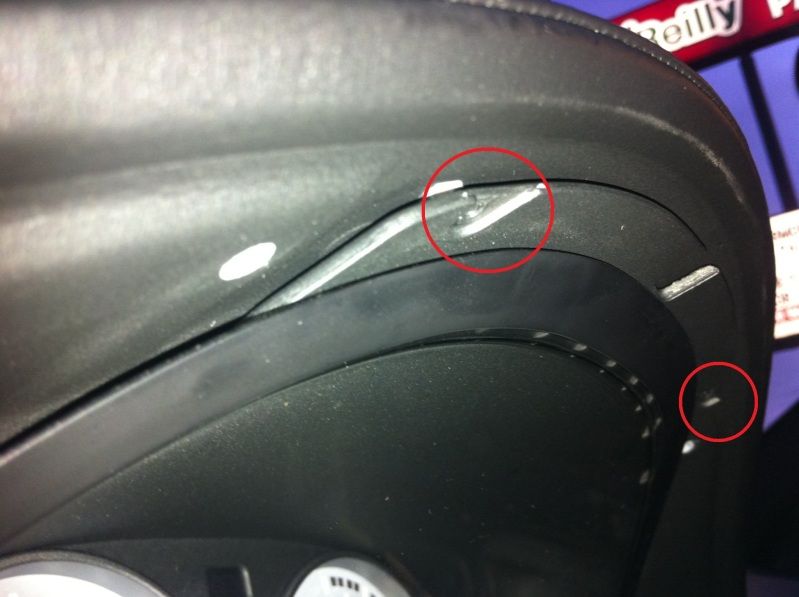
2. Once the screws are off, you will have to remove three (3) T-10 sied torx screws from the top of the cluster bezel:
![Image]()
3. Once the T-10 Torx and philips screws are removed, you can just pop off the bezel. I grabbed it from the inside edges along the fuel gauge and water temp gauge and pulled towards me. Do this carefully though, the bezel CAN crack and the plastic studs CAN break!
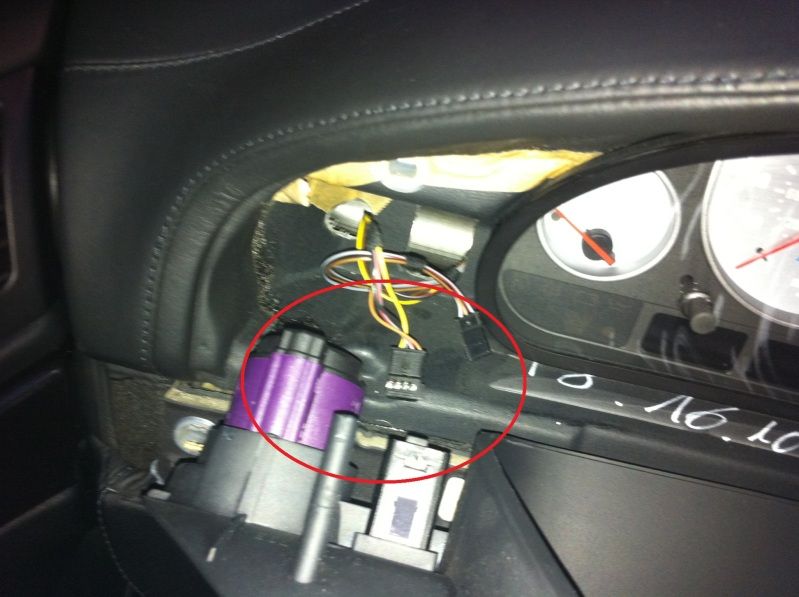
With the bezel off, you will see two connectors on the left hand side connecting your dimmer and light switch:
![Image]()
Unplug these. Note: once you unplug your headlight switch, your cluster will light up if your battery is still connected. You can leave the fog light switch plugged in, since I just swung the bezel over, and rest it on the center counsel. There is enough slack in the wiring to allow you to do this:
![Image]()
Be careful here! If you pull the fog light wiring out too much, you run the risk of pulling your TPMS wiring into your dash, since it is loomed together!
5. There will be two (2) T-10 Torx screws holding the cluster into the dash, remove these:
![Image]()
6. At this point, you can grasp the cluster around the bottom portion, and pull toward you slightly, it should come loose with no resistance!
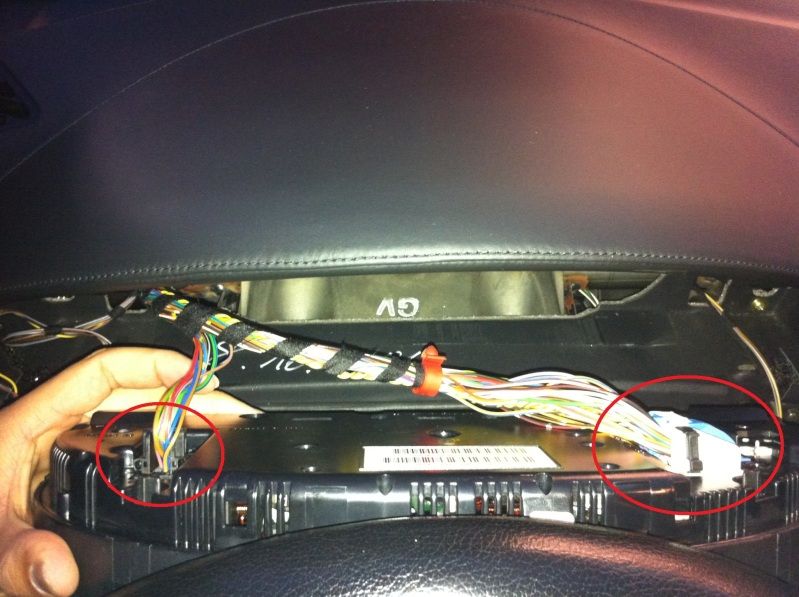
Now, there are three plugs: one (1) blue and one (1) white on the right hand side, and one (1) black on the left hand side of the cluster:
![Image]()
They will need to be removed. These plugs are those nifty slide lock ones, where you have to depress the small bump and slide the latch to the backside of the cluster. Very easy and will unplug with no issue.
Note: There might be a red plastic plug holding the wiring against the back of the cluster, if so, you can just pull it off, and plug it back when you put the cluster back in.
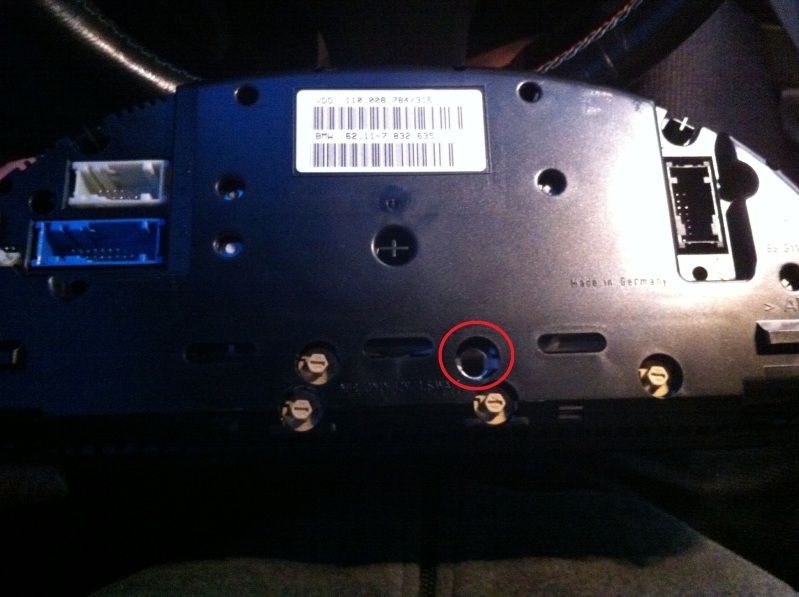
7. With the cluster loose, this is what it looks like on the back:
![Image]()
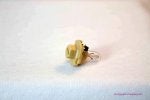
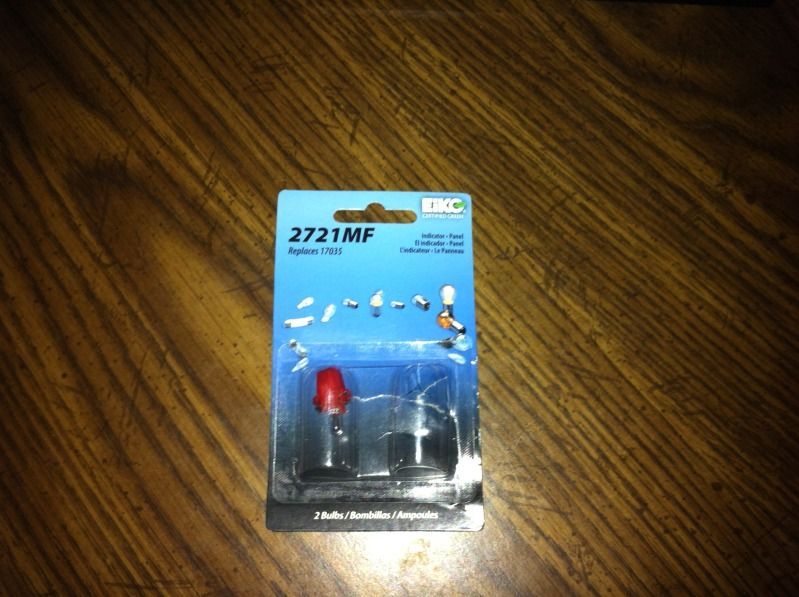
The circled bulb is the culprit in the lack of odometer back lighting. These bulbs were a pain to find! I removed the plug cover, expecting the bulb to be a slide in type, but instead found that the contacts were built into the bulb instead of the plug. I ended up going to O'Reilly auto parts and picked up a pair of these bad boys:
![Image]()
I know that the base is longer and it doesn't match the rest of the plugs, but they fit and doesn't cause issues. Besides, they were $4.00 after taxes. I figure it was going on the back of the cluster and no one will see it, so who cares. If you're nit-picky, then I'm not sure where you can find the OEM type bulb other than a dealer. Maybe eBay?
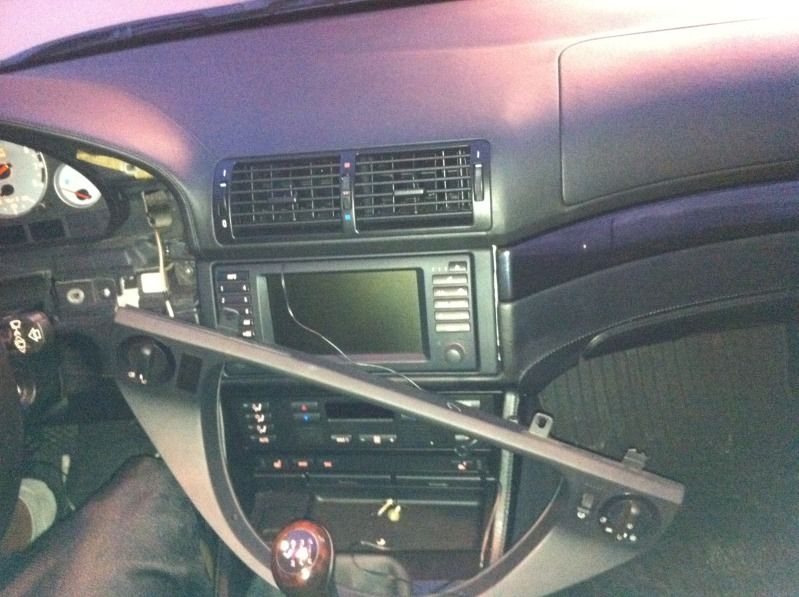
After the bulb was put in, I reversed the uninstall process, and got this:
![Image]()
Win! The unlit issue is fixed, and even my dead pixels in my temp gauge came back!
Hopefully this has been helpful. Thanks for taking the time to read!
:byebye:
Well This was the initial problem:
To recap, the illumination behind the odometer went out, and I wanted to see if I can fix it.
So, I decided to remove my cluster and see if a burnt bulb was the culprit!
This is my first DIY write up, I wasn't sure if this topic was covered, and I hope it is clear and concise enough so that it isn't confusing.
Tools you will need: philips head screwdriver, torx T-10 screwdriver, and some elbow grease.
BUT BEFORE WE START! HERE IS A DISCLAIMER!
When you remove the cluster, it WILL reset your OBC!! Meaning all your MPG calcs, mileage, auxiliary vent time, speed limit notifications, etc. will be lost! Along with seating memories, and your trip odometer!
If you're okay with this, then let's begin!
1. Remove the interior trim beneath the gauge cluster unplug the TPMS switch (if you have one), and you will find three (3) Philips screws, remove them:
one (1) on the right side of the steering column :
and two (2) on the left hand side.
2. Once the screws are off, you will have to remove three (3) T-10 sied torx screws from the top of the cluster bezel:
3. Once the T-10 Torx and philips screws are removed, you can just pop off the bezel. I grabbed it from the inside edges along the fuel gauge and water temp gauge and pulled towards me. Do this carefully though, the bezel CAN crack and the plastic studs CAN break!
With the bezel off, you will see two connectors on the left hand side connecting your dimmer and light switch:
Unplug these. Note: once you unplug your headlight switch, your cluster will light up if your battery is still connected. You can leave the fog light switch plugged in, since I just swung the bezel over, and rest it on the center counsel. There is enough slack in the wiring to allow you to do this:
Be careful here! If you pull the fog light wiring out too much, you run the risk of pulling your TPMS wiring into your dash, since it is loomed together!
5. There will be two (2) T-10 Torx screws holding the cluster into the dash, remove these:
6. At this point, you can grasp the cluster around the bottom portion, and pull toward you slightly, it should come loose with no resistance!
Now, there are three plugs: one (1) blue and one (1) white on the right hand side, and one (1) black on the left hand side of the cluster:
They will need to be removed. These plugs are those nifty slide lock ones, where you have to depress the small bump and slide the latch to the backside of the cluster. Very easy and will unplug with no issue.
Note: There might be a red plastic plug holding the wiring against the back of the cluster, if so, you can just pull it off, and plug it back when you put the cluster back in.
7. With the cluster loose, this is what it looks like on the back:
The circled bulb is the culprit in the lack of odometer back lighting. These bulbs were a pain to find! I removed the plug cover, expecting the bulb to be a slide in type, but instead found that the contacts were built into the bulb instead of the plug. I ended up going to O'Reilly auto parts and picked up a pair of these bad boys:
I know that the base is longer and it doesn't match the rest of the plugs, but they fit and doesn't cause issues. Besides, they were $4.00 after taxes. I figure it was going on the back of the cluster and no one will see it, so who cares. If you're nit-picky, then I'm not sure where you can find the OEM type bulb other than a dealer. Maybe eBay?
After the bulb was put in, I reversed the uninstall process, and got this:

Win! The unlit issue is fixed, and even my dead pixels in my temp gauge came back!
Hopefully this has been helpful. Thanks for taking the time to read!
:byebye:
")