

What's going on everyone?? We've been getting a lot of comments on Dinoc wrap, specifically how to install it, and since we've always hated the wood trim on our M5, what better place to start than there.
This was a fairly simple modification, but even with only one major screw up it still took us about 5 hours to complete. Definitely a bit time consuming, so budget a solid block of your Saturday to the project.
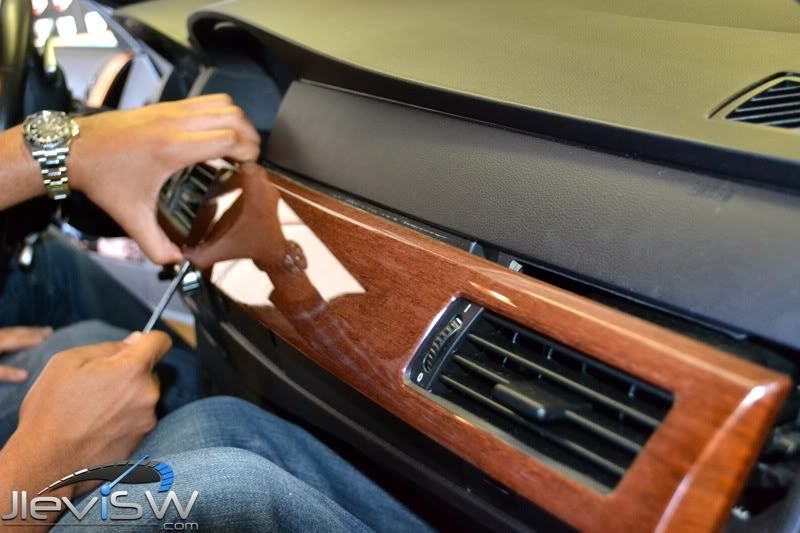
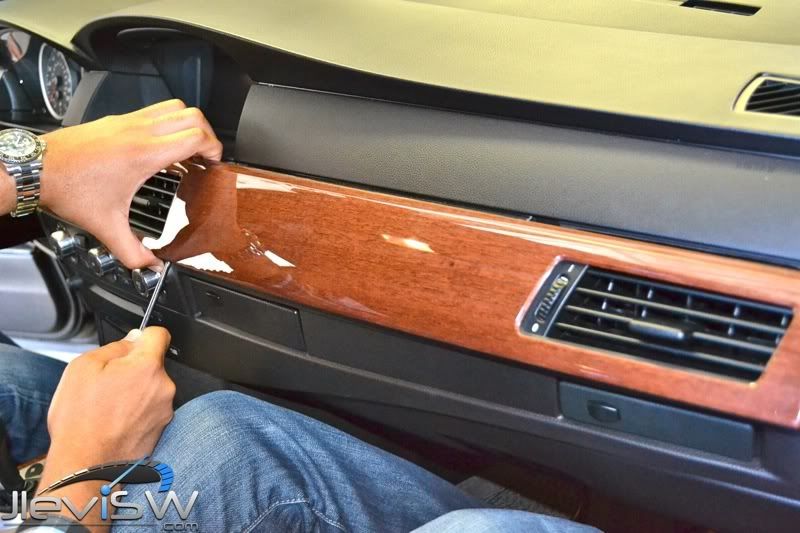
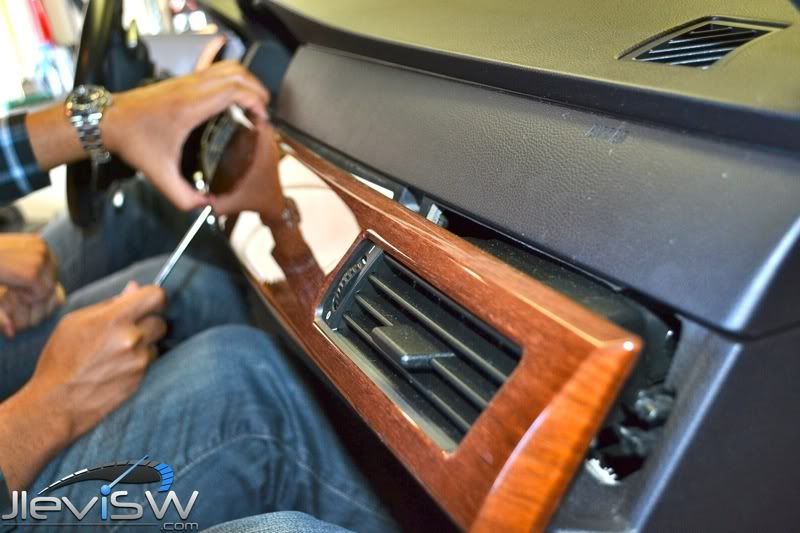
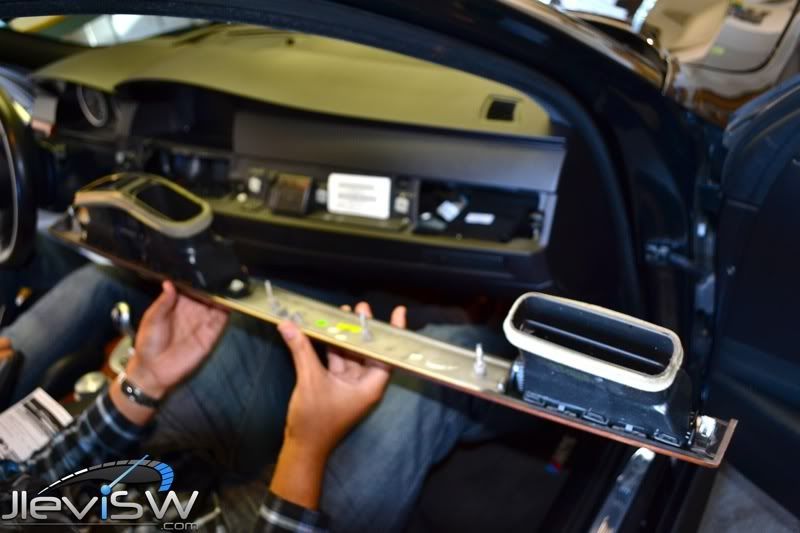
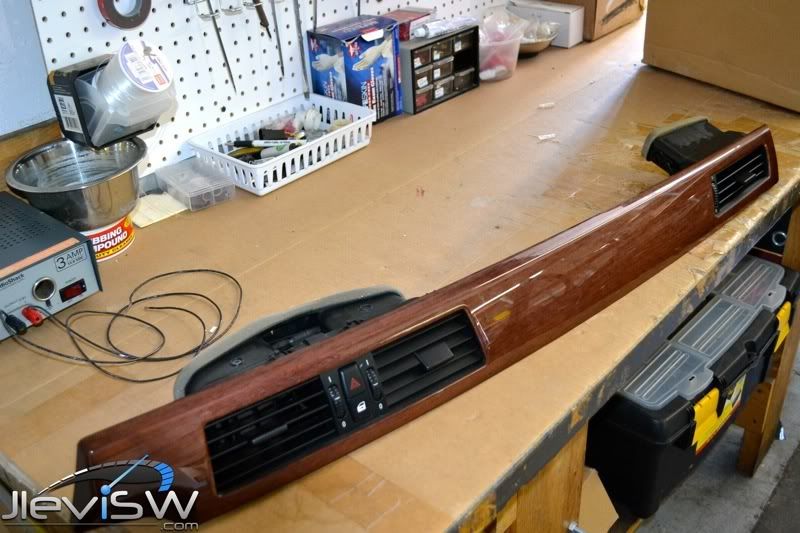
We started by removing the dashboard trim, which was surprisingly simple to remove. Take a screwdriver, or plastic putty knife and slide it under the edge of the trim. Gently pry upwards moving from one side to the other, and each of the five pins will pop out and release the trim and air vents.
![Image]()
![Image]()
![Image]()
![Image]()
![Image]()
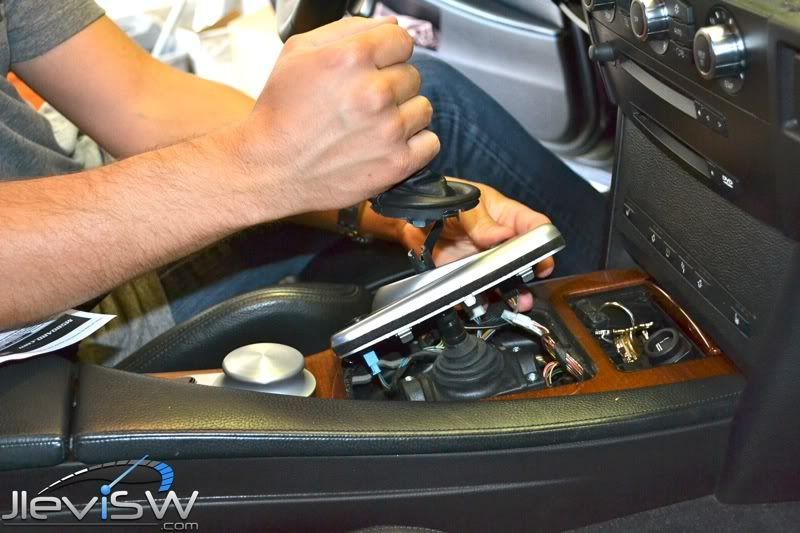
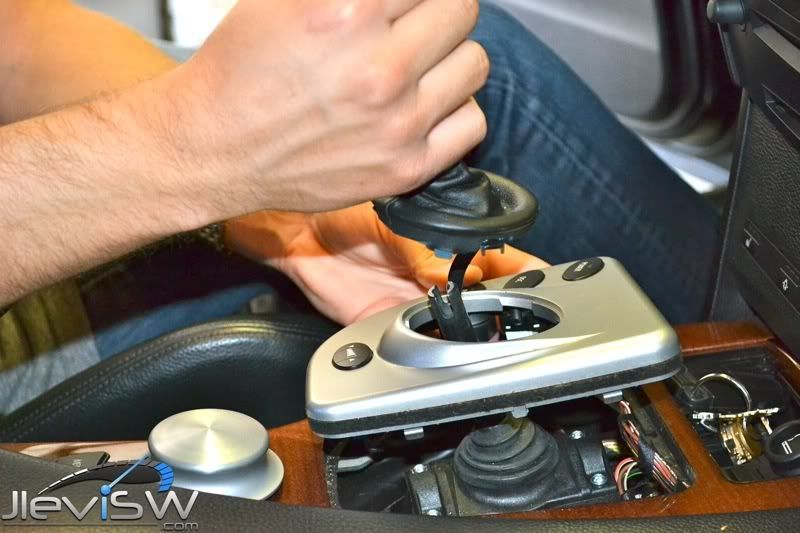
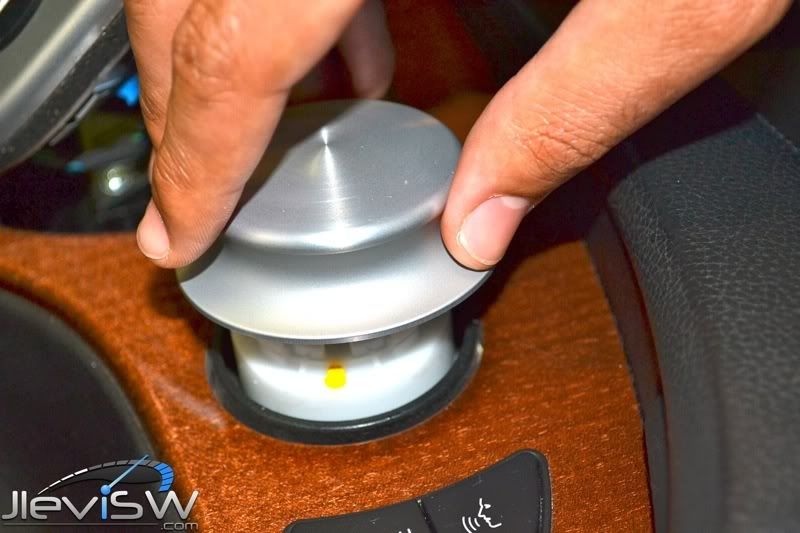
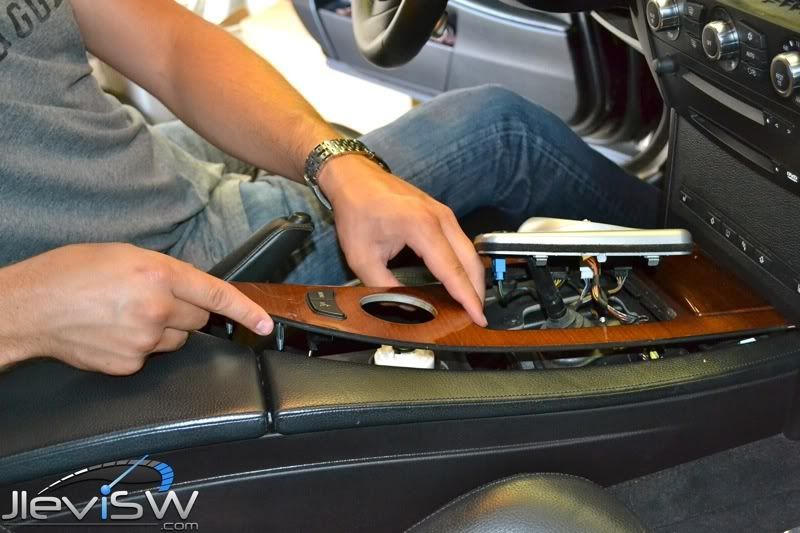
We did the center console trim next, and this part was the easiest of all the trim pieces, simply requiring a little elbow grease. The shift handle, and iDrive knob will both come off by pulling up on them with a good amount of force, and after that just remove the 2 screws hidden under the shift knob, and pull the trim towards you, and upwards. It may take some finagling to get the ash tray out correctly, but it should come out relatively easily
![Image]()
![Image]()
![Image]()
![Image]()
![Image]()
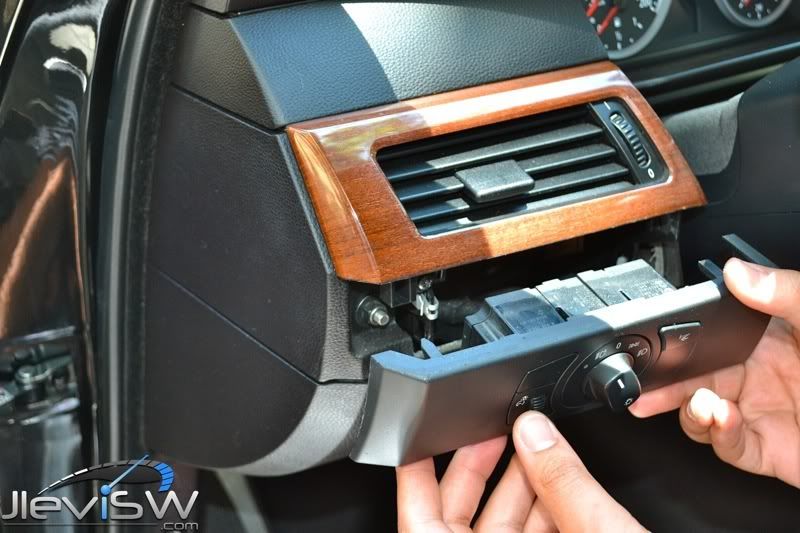
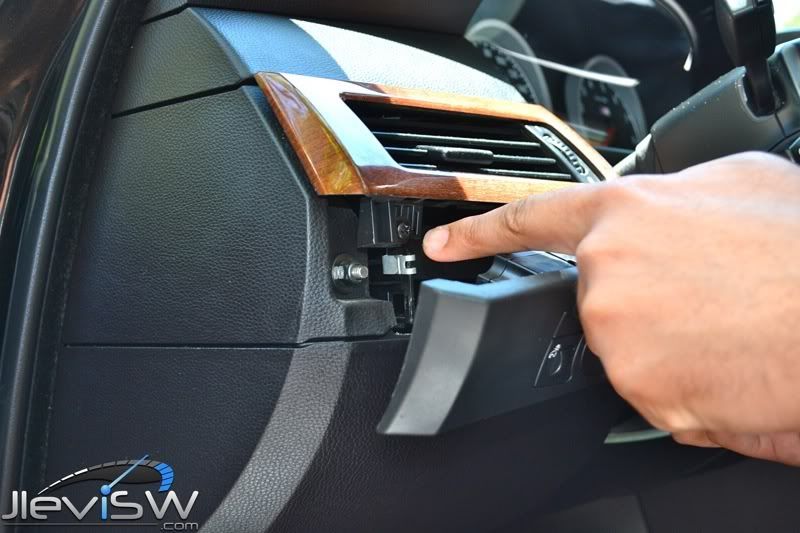
For the drivers side air vent, first pull on the lower piece containing the knob until it pops out. Behind this piece are 2 screws that need to be removed, and once these are out you can remove this vent with a screwdriver and some force, just like the rest of the dash trim.
![Image]()
![Image]()
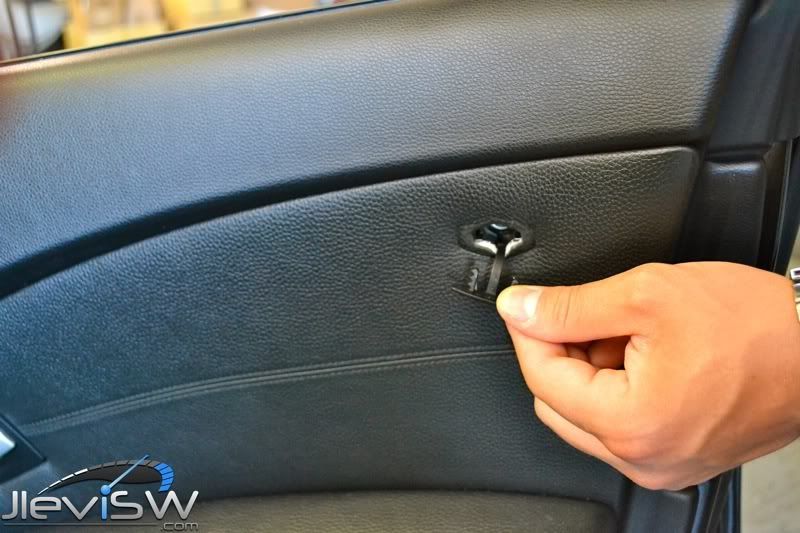
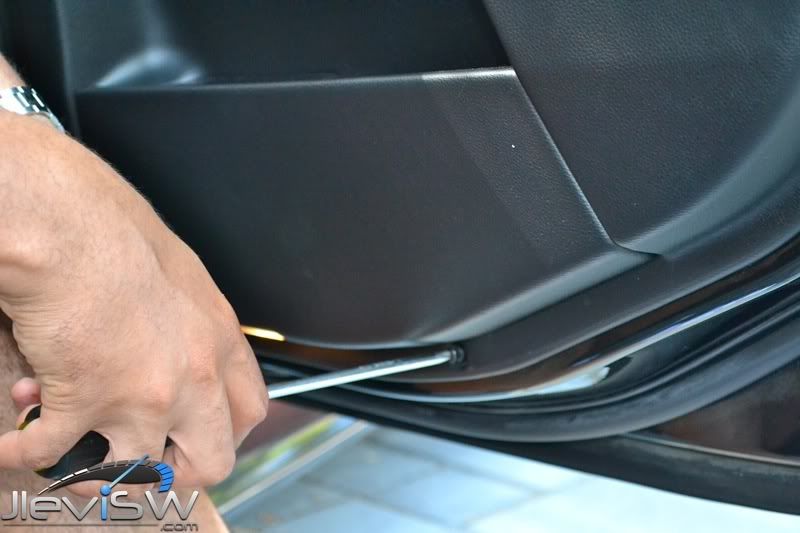
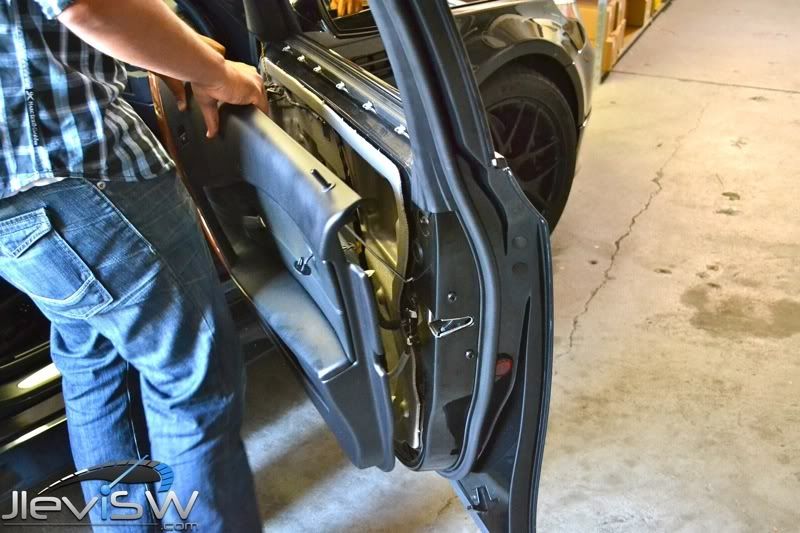
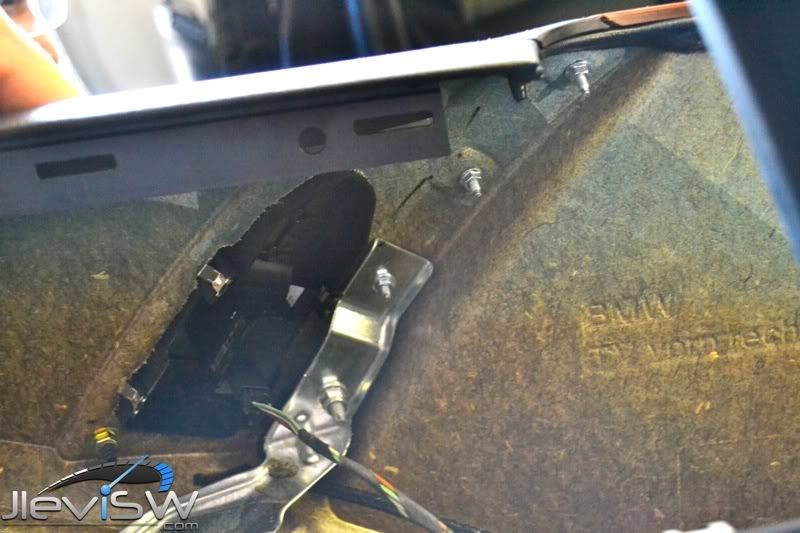
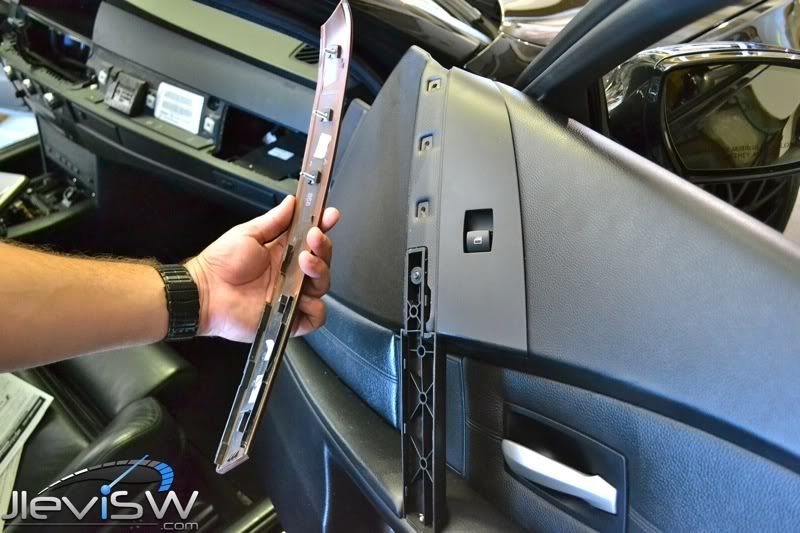
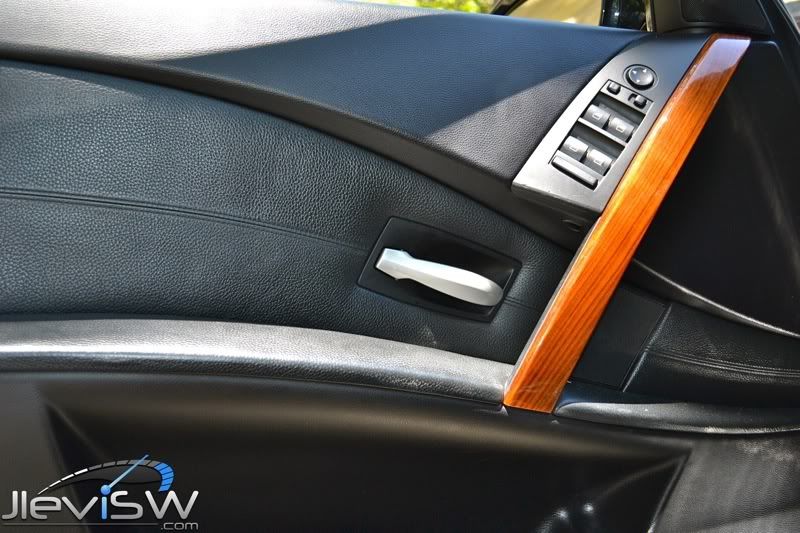
Now….the door handle trim was A LOT of fun, and requires removing the entire door panel. First start by removing the hidden screw behind the AIRBAG tab on the door, and the one screw on the inside panel of the door. Once these are out, pull on the door panel from one side to the other, until you have released all the clips that hold the panel to the door. We recommend 2 people for this part, one to pull, and one to catch the panel once it is freed.
![Image]()
![Image]()
![Image]()
![Image]()
![Image]()
Once the panel is free you will notice four nuts that need to be removed on the back side of the door handle. The small ones are 7mm, and the large one is 10mm. Remove these nuts, and pull the top part of the trim away from the panel. DO NOT pull on the bottom part to get it out!!! Remove the top portion and once all of the screws have cleared, SLIDE the bottom portion upward and it should come right out.
![Image]()
![Image]()
![Image]()
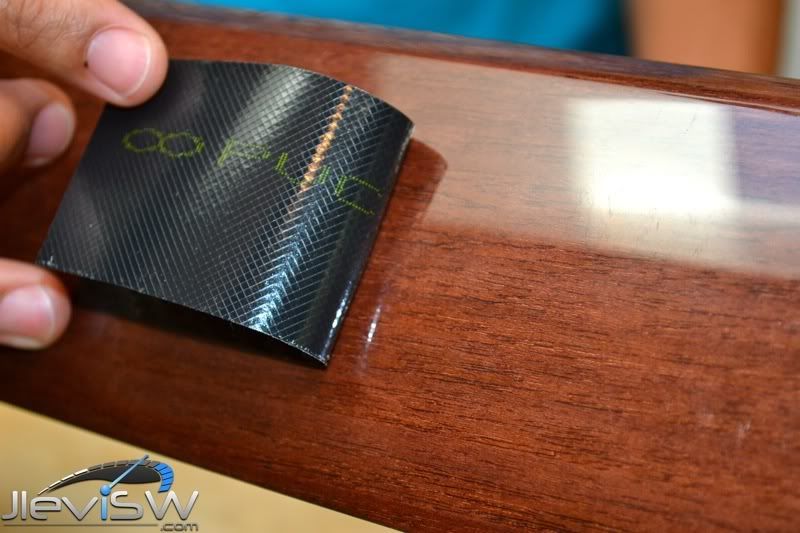
Now that you have your trim removed you may start the wrapping process. We wrapped the center console first, but then while we were wrapping the dash piece we noticed that we had the weave going in a different direction, and had to remove the entire piece and start over. For those out there that are worried that Dinoc will ruin the underlying trim, these first 2 pictures clearly show ZERO residue from the material, even after we had the part completely covered.
![Image]()
![Image]()
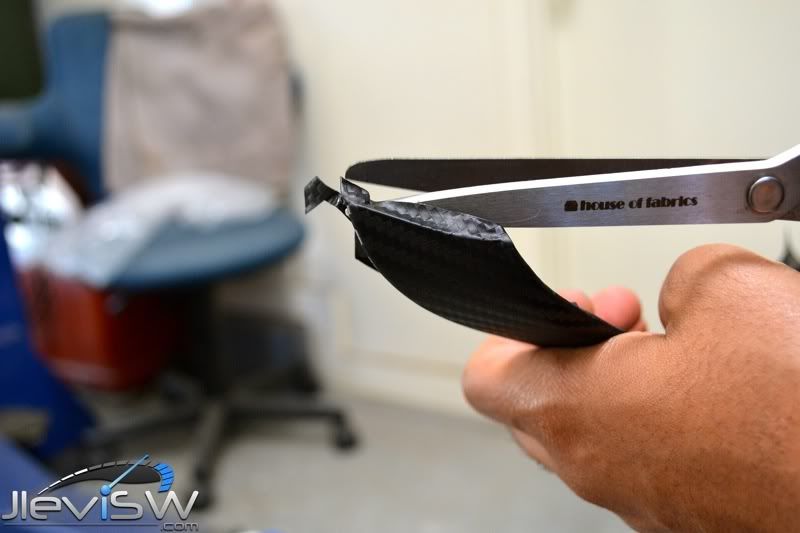
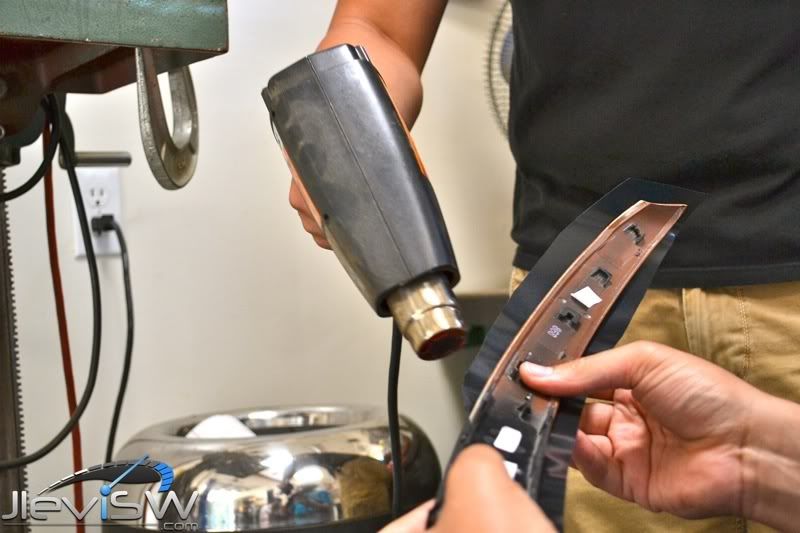
The wrapping process itself is fairly simple, and requires only an exacto knife or razor blade, some scissors, and a heat gun. THE HEAT GUN IS KEY!! Cover your trim in a solid piece of Dinoc fabric and then trim the excess pieces away until there is just enough to wrap around the edge of each piece. Use the heat gun to apply minimal heat to the edges of the trim, and the Dinoc will form to the shape of the piece almost by itself. DO NOT get too close to the fabric, or apply too much heat, by doing so you will end up melting the Dinoc!!
![Image]()
![Image]()
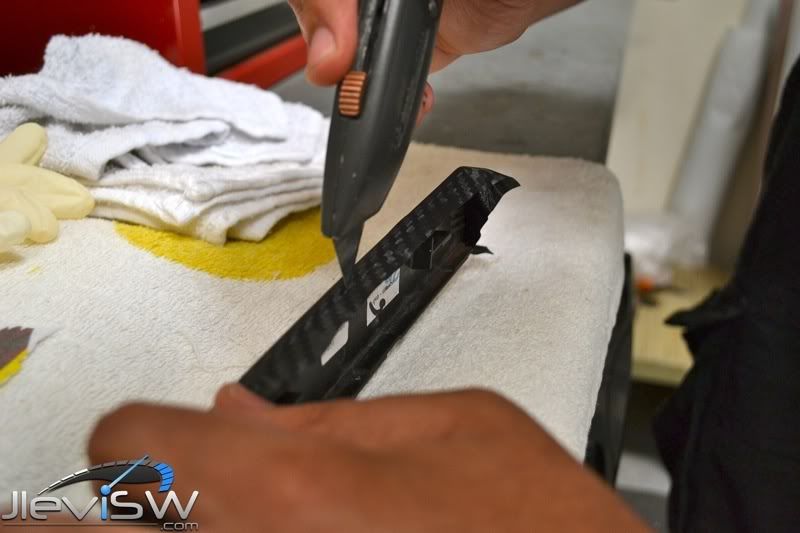
Once you have heated and conformed the fabric to the piece, use the exacto knife or razor blade to trim away any tiny bits of excess material that may hinder re-installation.
![Image]()
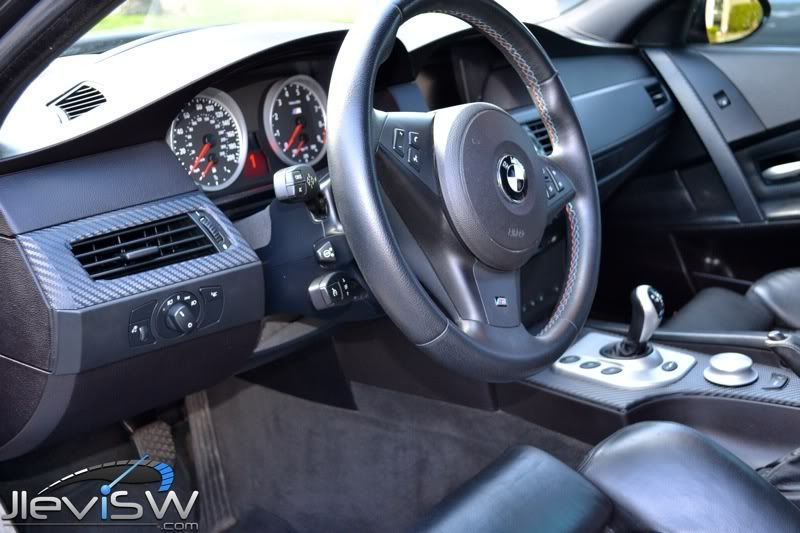
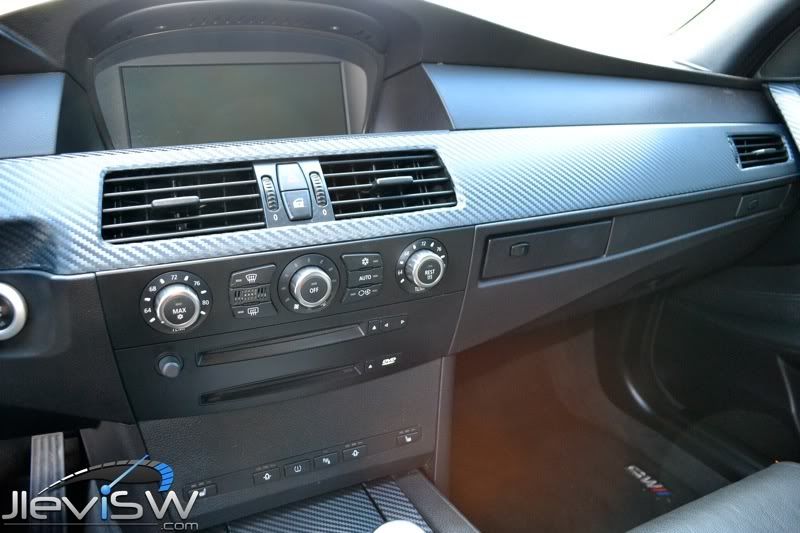
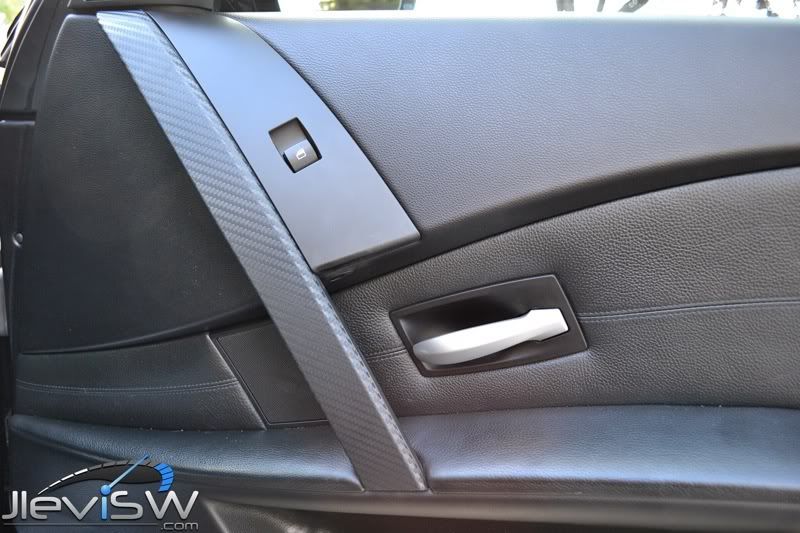
Once your parts are wrapped, put your car back together and you instantly have a much more aggressive looking interior. Finished product pics are below, with a before and after of the driver and passenger side door handles.
![Image]()
![Image]()
![Image]()
![Image]()
![Image]()
![Image]()
Hope this helps!!! And thanks for reading!!
This was a fairly simple modification, but even with only one major screw up it still took us about 5 hours to complete. Definitely a bit time consuming, so budget a solid block of your Saturday to the project.
We started by removing the dashboard trim, which was surprisingly simple to remove. Take a screwdriver, or plastic putty knife and slide it under the edge of the trim. Gently pry upwards moving from one side to the other, and each of the five pins will pop out and release the trim and air vents.
We did the center console trim next, and this part was the easiest of all the trim pieces, simply requiring a little elbow grease. The shift handle, and iDrive knob will both come off by pulling up on them with a good amount of force, and after that just remove the 2 screws hidden under the shift knob, and pull the trim towards you, and upwards. It may take some finagling to get the ash tray out correctly, but it should come out relatively easily

For the drivers side air vent, first pull on the lower piece containing the knob until it pops out. Behind this piece are 2 screws that need to be removed, and once these are out you can remove this vent with a screwdriver and some force, just like the rest of the dash trim.
Now….the door handle trim was A LOT of fun, and requires removing the entire door panel. First start by removing the hidden screw behind the AIRBAG tab on the door, and the one screw on the inside panel of the door. Once these are out, pull on the door panel from one side to the other, until you have released all the clips that hold the panel to the door. We recommend 2 people for this part, one to pull, and one to catch the panel once it is freed.
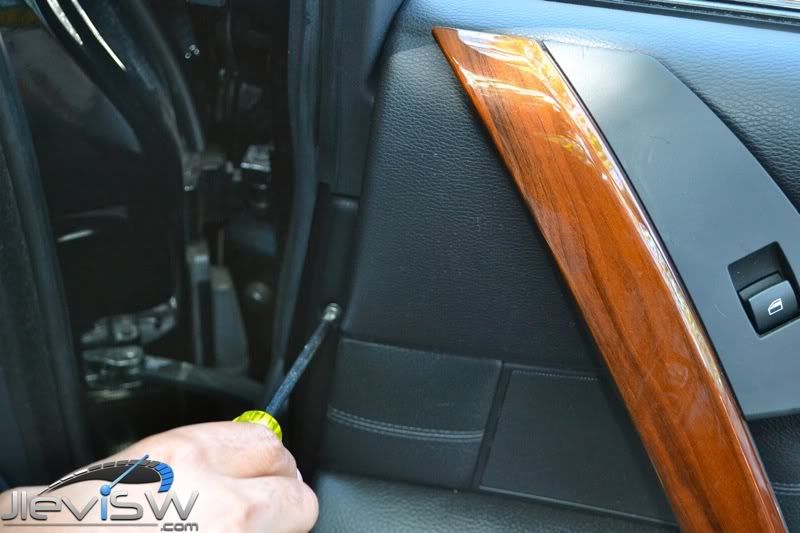
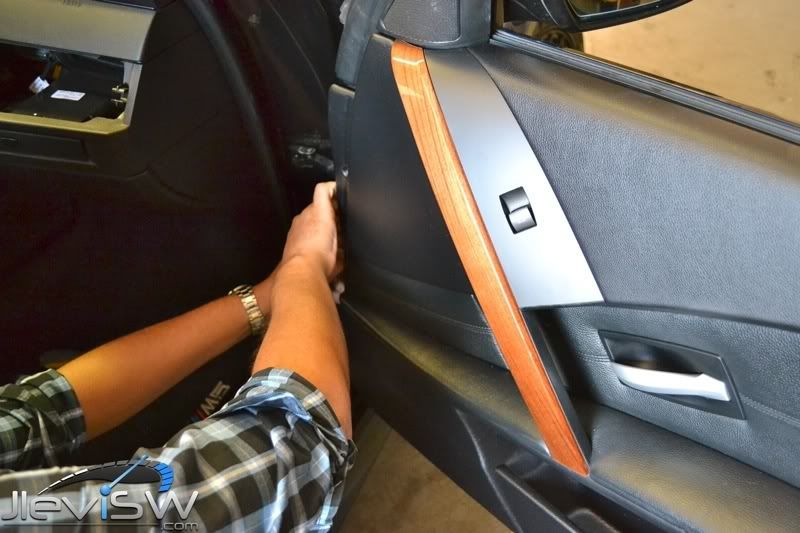
Once the panel is free you will notice four nuts that need to be removed on the back side of the door handle. The small ones are 7mm, and the large one is 10mm. Remove these nuts, and pull the top part of the trim away from the panel. DO NOT pull on the bottom part to get it out!!! Remove the top portion and once all of the screws have cleared, SLIDE the bottom portion upward and it should come right out.

Now that you have your trim removed you may start the wrapping process. We wrapped the center console first, but then while we were wrapping the dash piece we noticed that we had the weave going in a different direction, and had to remove the entire piece and start over. For those out there that are worried that Dinoc will ruin the underlying trim, these first 2 pictures clearly show ZERO residue from the material, even after we had the part completely covered.

The wrapping process itself is fairly simple, and requires only an exacto knife or razor blade, some scissors, and a heat gun. THE HEAT GUN IS KEY!! Cover your trim in a solid piece of Dinoc fabric and then trim the excess pieces away until there is just enough to wrap around the edge of each piece. Use the heat gun to apply minimal heat to the edges of the trim, and the Dinoc will form to the shape of the piece almost by itself. DO NOT get too close to the fabric, or apply too much heat, by doing so you will end up melting the Dinoc!!
Once you have heated and conformed the fabric to the piece, use the exacto knife or razor blade to trim away any tiny bits of excess material that may hinder re-installation.
Once your parts are wrapped, put your car back together and you instantly have a much more aggressive looking interior. Finished product pics are below, with a before and after of the driver and passenger side door handles.


Hope this helps!!! And thanks for reading!!


") will be doing this next weekend
will be doing this next weekend


